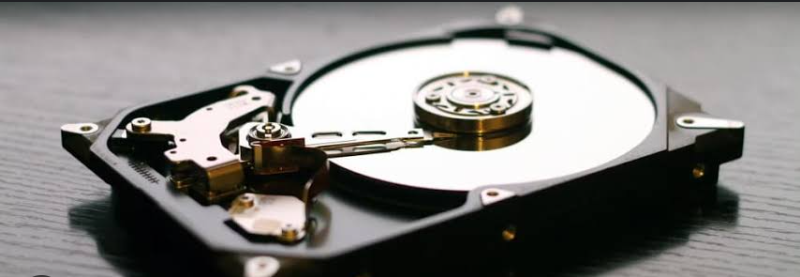
Exploring the Dynamic World of LVM in Linux.
Explore More; “Exploring the Security Landscape of Linux Against Viruses”
LVM, an acronym for Logical Volume Manager, epitomizes the epitome of virtualization technology when it comes to disk and storage management in the realm of Linux. This ingenious creation offers a dynamic and flexible solution, empowering users to mold storage space management according to their unique requirements. Creating logical volumes becomes a breeze with LVM, seamlessly managing disk allocation. Effortlessly crafting partitions and artfully constructing virtual groups, LVM harmoniously combines hard disks within storage devices.
Moreover, LVM’s prowess extends to the creation of software RAIDs, ensuring a harmonious symphony of storage optimization.
For those discerning individuals who are contemplating the acquisition of a Linux VPS, LVM emerges as a veritable godsend. It bestows upon them the ability to deftly navigate the ever-changing tides of storage needs, ensuring that disk space is judiciously allocated.
Thus, it is incumbent upon Linux server administrators to embrace the installation of LVM on their esteemed servers, for it is through this noble act that the pinnacle of productivity shall be attained.
LVM
Logical Volume Manager in Linux enhances storage flexibility by abstracting physical devices like disks and partitions into logical volumes. This abstraction optimizes storage operations, introduces advanced features for dynamic management and data protection, ultimately minimizing downtime.
We’ll delve into key concepts in the following sections.
Physical Volumes (PVs):
A partition or raw storage device that can be a physical hard disk, SSD, or a partition on a disk. Managing and allocating physical volumes through LVM are performed using the pvcreate command.
Volume Groups (VGs):
A logical container that allows the grouping of one or more physical volumes for collective storage management. To create a volume group and add one or more physical volumes to it, you should use the vgcreate command.
Logical Volumes (LVs):
Logical Volumes are Logical storage units formatted with a file system and function similarly to regular partitions for storing data. The lvcreate command is used to create logical volumes and adjust their size, as well as to extend the size of the volume group. Logical volumes are used for storing files and data, and they can be mounted, unmounted, resized, and managed, much like regular partitions. After creation and formatting by file systems using tools such as mkfs, logical volumes are usable as directories in the file hierarchy.
Dynamic management capability is a key advantage of LVM, allowing you to determine the size of logical volumes and volume groups. Additionally, LVM will enable you to make instant copies of a logical volume called snapshots and use them for backup, system recovery, or testing changes.
It safeguards data by supporting mirroring and striping. In mirroring, LVM creates redundant copies of data across multiple physical volumes for added resilience. Simultaneously, striping involves distributing data across different PVs in a volume group, boosting both read and write performance.
Key features of LVM
Deciding whether to install LVM on your Linux system is influenced by understanding its features and advantages. Exploring the benefits of LVM installation provides valuable insights into leveraging its features. Let’s acquaint ourselves with the features of LVM.
- Creates logical volumes covering one or more physical disks or partitions used for exchange space, file systems, or any other storage needs.
- Establishes logical entities called volume groups for grouping and managing multiple physical volumes.
- Manages partitions and physical storage devices, making disk replacement and expansion easy.
- By providing the ability to create thinly logical volumes, it eliminates the need for a large initial consumption of space. It initially considers minimal space and dynamically grows as data is added. This feature aids in optimal disk utilization.
- It allows the creation of snapshots of logical volumes for backup purposes or non-disruptive system testing.
- It supports Data Striping across multiple physical volumes, playing a crucial role in improving read and write performance.
- The Data Mirroring feature in LVM protects against data loss in the event of disk failure by maintaining multiple copies of data on separate physical volumes.
- It allows resizing logical volumes and volume groups, enabling you to add or remove storage space without deleting the file system or disrupting services.
- It provides flexibility and cohesiveness in storage management by seamlessly integrating with RAID (Redundant Array of Independent Disks) software, allowing for adaptable and synchronized storage management.
Requirements for setting up LVM partitions in Linux
Before LVM installation in Linux, pay attention to the following requirements:
- A Linux server or system running modern Linux distributions.
- Root user or sudo privileges for installing packages and configuring LVM.
- Adequate disk space and the availability of one or more hard disks, SSDs, or partitions with storage space.
- Backup your data before changing the storage configuration for data protection and recovery.
Install LVM in Linux
Then, press the ‘y’ key and hit Enter.
The LVM installation process on Linux may take some time, but after a short wait, it will be successfully installed on your Linux system.
3. Start and Enable LVM Service
On systemd-based systems, it may be necessary to ensure the automatic startup of the LVM service during the boot of the Linux system. To achieve this, start and enable the LVM service by running the following commands:
sudo systemctl start lvm2-lvmetad
sudo systemctl enable lvm2-lvmetad
4. Verify LVM Installation
To ensure that LVM is properly installed and running, use the lvs (list logical volumes), lvdisplay (display logical volume properties), or lvm version commands:
sudo lvs
How to create LVM partitions in Linux
Embark on your LVM journey with our guide, which will assist you in creating volume groups, logical volumes, extending and mounting a logical volume, and accomplishing various objectives.
Follow these steps to get started.
Identifying Your Physical Volumes (PVs)
Before creating logical volumes and volume groups, it’s crucial to identify the physical volumes (disks and partitions) in use. Commands like lsblk or fdisk, which list all partitions or disks, help you recognize and select the empty physical volume you desire to configure for LVM usage.
lsblk
Creating a Partition on a Disk
To initiate the creation of a partition on a hard disk, begin by selecting the disk of choice. Next, employ the fdisk command along with the device name of the target disk to create the partition.
For instance, if the intention is to create a partition on the disk /dev/sdX:
sudo fdisk /dev/sdX
Replace /dev/sdb with your actual disk’s name.
The fdisk command supports various options to enhance its functionality, including ‘n‘ (To create a new partition) and ‘p‘ (To create a primary partition). You will be prompted to specify the first and last sectors for the partition, where pressing Enter allows you to allocate the entire disk for the partition and accept the default values set for the partition.
To create an empty partition table on the disk, input the letter ‘o‘ and press Enter. Then, to create a new partition, type ‘n‘ and press Enter. Press Enter to accept the default values for using the entire disk.
Next, run the command ‘t,’ press Enter, and type ‘8e‘ as the Hex code to change the partition type. Press Enter again.
To write the changes to the disk after creating the partition, execute the ‘w‘ command. Remember to perform this step to save the partition information.
Finally, to quit fdisk after writing the changes, type ‘q.’
After creating the partition, you can format it with the file system of your choice (e.g., ext4, ntfs, etc.). Apply your desired format using the following command.
For example:
sudo mkfs.ext4 /dev/sdX1
Replace /dev/sdX1 with the actual partition device name created.
Congratulations, your new partition (in our example /dev/sdX1 ) is created and ready to be integrated into LVM.
Initialize Physical Volumes
At this crucial stage, once you have carefully chosen or crafted a partition to serve as a physical volume, it is time to seamlessly integrate your preferred partition into LVM. This can be achieved by initializing the physical volume using the powerful pvcreate command. Let’s take a practical example to illustrate this process.
Suppose we have just created a new partition (/dev/sdX1) and now we are ready to initialize it.
sudo pvcreate /dev/sdX1
Replace /dev/sdX1 with the name of your preferred partition or disk. This action initializes your physical volume, seamlessly integrating it into the LVM ecosystem.
-
Listing Physical Volumes
To view a list of available physical volumes, execute the following command:
sudo pvscan
-
Displaying more information about PV
If you want to gain more information about all available physical volumes or a specific physical volume, you can use the following command:
pvdisplay
Creating a Volume Group (VG)
To collectively manage multiple physical volumes effectively, utilize the vgcreate command after the initial setup of physical volumes to create a volume group. For instance, if the objective is to create a volume group named ‘myvg’ using the physical volume:
sudo vgcreate myvg /dev/sdX1
As a result, you’ve created a unified storage repository, which is the basis of LVM operation.
-
Listing volume groups
To check the list of created volume groups, use the following command:
sudo vgscan
-
Displaying more information about VG
For more detailed information about all volume groups or a specific volume group, employ the following commands:
To get more detailed information about all volume groups or a specific volume group,
sudo vgdisplay
-
Extending a Volume Group
You might want to add more physical volumes to a volume group. To increase storage capacity, you can expand the volume group by running the following command:
sudo vgextend myvg /dev/sdX2
we added a new physical volume named /dev/sdX2 to the newly created volume group “myvg.”
Creating Logical Volumes (LVs)
Once you’ve established the volume group, exercise the capability to create LVM Logical Volumes. Use the lvcreate command to craft a logical volume with a specified size within the volume group.
For instance, creating a logical volume named “mylv” with a size of 10 GB in the volume group “myvg” involves executing the following command:
sudo lvcreate -n mylv -L 10G myvg
‘-n‘ sets the Logical Volume name, and ‘-L‘ specifies the size.
-
Viewing Logical volumes
To view the created Logical Volumes in the Volume Group, use the following command:
sudo lvscan
-
Viewing details about LV
To view more information about a specific LV or all logical volumes created, run the following command:
sudo lvdisplay
-
Resizing a logical volume
Benefiting from its valuable advantages, Logical Volume offers exceptional flexibility and scalability, expanding according to your variable needs.
For instance, if the need arises to increase the size of a created Logical Volume by 6 GB, execute the following command:
Formatting the Logical Volume
Following the creation of the Logical Volume, proceed to format it with your desired file system. Coordinate and organize your chosen file system with the Logical Volume using the mkfs command.
For instance, to format “mylv” with the ext4 file system, execute the following command:
sudo mkfs.ext4 /dev/myvg/mylv
Instead of /dev/myvg/mylv, replace it with the path of your Logical Volume.
Mounting the Logical Volume
While creating new volumes is essential, fulfilling your needs requires understanding how to utilize Logical Volumes in Linux. To integrate Logical Volumes into the system and make the most of them, follow these steps: create a mount point (a directory) first, and then mount your Logical Volume on it.
For instance, to mount “mylv” on the /mnt/mydata directory, execute the following commands:
sudo mkdir /mnt/mydata
sudo mount /dev/myvg/mylv /mnt/mydata
By employing these commands, you successfully created a directory /mnt/mydata as a mount point. Subsequently, you mounted the Logical Volume “mylv” onto it, rendering the data accessible for any purpose.
Auto-Mount at Boot
If you intend to mount the Logical Volume during Linux system boot automatically, you should open the /etc/fstab file with your preferred text editor and add the following entry to it:
nano /etc/fstab /dev/myvg/mylv
/mnt/mydata ext4 defaults 0 0
Managing Logical Volumes
To manage Logical Volumes in Linux, utilize LVM commands for tasks such as resizing and creating snapshots. Key commands for handling new volumes include:
- lvresize: Adjusts the size of Logical Volumes.
- lvcreate –snapshot: Instantly creates a snapshot to capture the state of a Logical Volume at a specific moment.
- lvconvert –merge: Merges the snapshot into the original volume.
- lvremove: Deletes a Logical Volume.
For practical illustration, consider creating an instant snapshot named “mylv_snapshot” with a size of 3 GB based on the original Logical Volume /dev/myvg/mylv. Execute the following command:
lvcreate -s -n mylv_snapshot -L 3G /dev/myvg/mylv
Creating instant copies of volumes for backup, recovery, and data analysis purposes is useful.
If you no longer need a Logical Volume, you can remove it from your volume group by executing the lvremove command:
lvremove /dev/myvg/mylv
Checking LVM Configuring Details
The following command helps you gain a general insight into the LVM configuration, including physical volumes, logical volumes, and volume groups:
pvs && vgs && lvs
This command provides information about physical volumes, volume groups, and logical volumes, along with a snapshot of the current state of LVM.
Explore More, Launching Linux from USB on a Windows Computer
Stay Connected on Meta ,X,Instagram .