
Setting Up a VPN and Incorporating a Server Key for Webmin.

Free software, Webmin, empowers users to administer servers effortlessly through a web interface. This intuitive platform facilitates the management of diverse server settings, including users, groups, files, and databases.
With Webmin, server management becomes accessible from any internet-connected location, eliminating the need for users to delve into the command line or possess specialized knowledge in system administration.
VPN creation process
Installing OpenVPN server on Ubuntu 22.04. Let’s install OpenVPN server packages.
To do this, run the command in the terminal:
sudo apt install openvpn easy-rsa
To establish a connection between Ubuntu and the OpenVPN server, ensure both the server and client have both packages installed. No additional actions are required; the web interface will seamlessly handle the rest for us.
Installing the OpenVPN Management Pack on Ubuntu 22.04
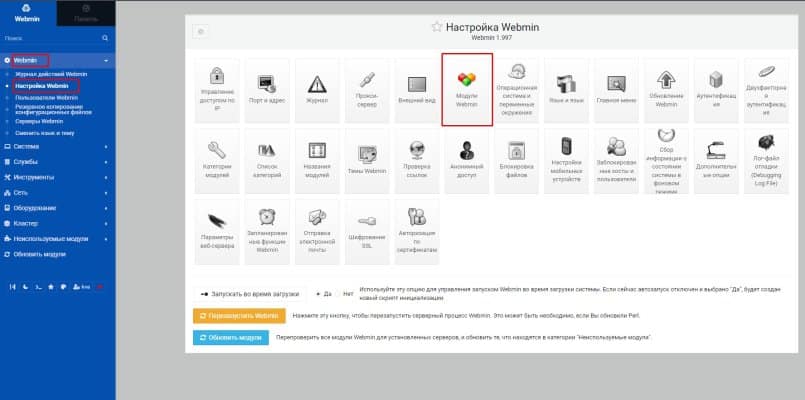
Proceeding to a crucial step, access the GitHub repository for the module as the website has been inaccessible for an extended period. Install the latest version of the Webmin OpenVPN + CA module by navigating to the WebMin web interface.
Head to WebMin Settings and choose “WebMin Modules.
Install the downloaded module:
You need to set up a certificate authority, but we will fix the installation problem. You can leave everything as it is and move on to setting up, then the standard OpenVPN client downloaded from the site will complain that the hash algorithm is too weak (“You are using insecure hash algorithm in CA signature. Please regenerate CA with other hash algorithm.” ) and you will not be able to connect.
The standard hash algorithm of the WebMin module is set to md5, but it needs to be changed to sha256. Let’s go to the ssl config file.
sudo nano /etc/openvpn/openvpn-ssl.cnf
Next line default_md = md5 change md5 to sha256
default_md = sha256
Now the official OpenVPN client will not complain about the weak hash algorithm.
Setting up a certificate authority
Go to “Services”, select “OpenVPN + CA”, “Certification Authority List”.
Then you just need to enter the organization data or leave it as is. The main thing is to enter the name of the certification authority by changing the text “changeme”.
Save and move on to adding the server key and OpenVPN server client keys.
Add a server key and a client key
Let’s go to the “Key List” of our new certification authority:
Only one key is enough for the server, but you need to create it. You can call it anything you like, for example, “server”; we do not create any passwords for it. First of all you need “Server” in “Key Server”:
Let’s move on to creating a key for the client. Go to “Key List”, but in “Key Server” select “Client” and set a password for the client. Name the certificate as convenient, you will need to select it later.
Enhance Your Hosting Experience with AMAZINGRDP
If you’re managing remote desktops, dedicated servers, or cloud applications, you need a secure and high-performance hosting solution. AMAZINGRDP offers top-tier RDP and dedicated server services optimized for speed, security, and reliability.
🔹 Explore Our Hosting Solutions
- USA RDP & EUROPE RDP – Secure and fast remote desktops.
- Dedicated RDP & Private RDP – High-privacy, fully controlled environments.
- Residential RDP – Best for secure browsing and location-based tasks.
- Admin RDP – Full administrative access for advanced users.
- Multi-Threading RDP – Optimized for CPU-intensive tasks.
- Streaming RDP & Graphic Card RDP – Designed for video editing, gaming, and rendering.
- Encoding RDP & Rendering RDP – Power-packed solutions for content creators.
- GPU Dedicated Server & AMD Dedicated Server – Ideal for AI, ML, and high-performance workloads.
- Forex RDP & Botting RDP – Secure, optimized solutions for traders and automation tasks.
Explore More; Best Free built-in VPN Browser
Stay Connected on Meta , X, Instagram .
EXPLORE OUR BLOGS.