Lets secure our Network,
A Guide to Blocking and Unblocking Websites on Mikrotik is plated over here.
Explore More; Mikrotik VPS
Blocking Websites with MikroTik Firewall
Websites are blocked by MikroTik Firewall using Filter Rules. There are two pieces to a MikroTik filter rule.
- Conditional part: This section matches conditions using a variety of conditional attributes, including Layer 7 Protocol, Source Port, Destination Port, Protocol, Chain, and so on.
- Action part: This portion blocks any website with a single drop action.
Unveiling the Significance of Layer 7 Protocols
In the realm of digital fortification, the MikroTik Firewall stands as a formidable guardian, capable of discerning the intricate nuances of Layer 7 Protocol.
This sophisticated protocol, with its astute utilization of Perl Regex, possesses the power to identify and match keywords within the vast expanse of URLs. Once a match is found, the Filter Rule, imbued with the prowess of this Layer 7 Protocol, springs into action, executing the appropriate measures.
To safeguard against the pernicious influence of certain websites, such as the ubiquitous Facebook or the captivating YouTube, we shall employ the artistry of Regex to establish a Layer 7 Protocol. This protocol, akin to a virtuoso conductor, orchestrates the harmonious symphony of our Filter Rule, effectively preventing access to any website that harbors the designated keywords.
Now, let us delve into the meticulous process of crafting this digital defense.
It unfolds in two elegant steps, each bearing its own significance.
Step 1 entails the creation of a bespoke layer-7 protocol, meticulously tailored to select the desired website. This intricate task demands a discerning eye and a deft touch, as we navigate the labyrinthine pathways of cyberspace.
Once the layer-7 protocol has been meticulously fashioned, we proceed to Step 2, where the firewall rule takes center stage. With unwavering resolve, we forge a formidable barrier, impervious to the allure of the chosen website.
This firewall rule, a testament to our unwavering commitment to digital security, stands as an impenetrable fortress, shielding us from the temptations that lie beyond.
Optimal Strategies for Website Blocking on MikroTik in 2024
Blocking websites is a necessary task for a network administrator because it can optimize work hours and ensure that resources such as the internet are used for business purposes only that is, not for leisure activities like social media, streaming videos, news websites, or even online stores.
Let’s go through this guide to review three different methods to block website on Mikrotik. In the end, you will know how to block Facebook, YouTube, etc. on Mikrotik.
Solution 1. Using Web Proxies to Block Website
Navigate to the Web Proxy Access Settings through the following path:
- Click the IP menu > Web Proxy (Bottommost) to view the settings.
- Look for the navigation on the right side of the page under the General web proxy option, then select Access.

- Click the Blue + sign in the upper right corner of the menu bar to add a blocked website, then fill in.
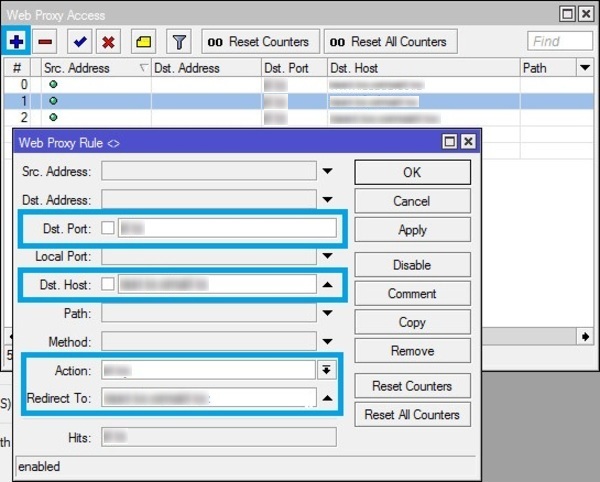
- The above-highlighted options work as:
- Dst Port: is filled with the port used by users to explore websites.
- Dst Host: is filled by the address of the website you prefer to block.
- Actions: Block the address of the website you wrote on the Dst Host.
- Redirect to: Redirect/redirect the blocked site to another.
- When you are done, click OK.
- By browsing the address entered in the Dst Host field, you will see “Access Denied”.
When to Use Web Proxies to Block Website in Mikrotik
Using a web proxy to block websites has a drawback: it cannot block HTTPS websites like Facebook and YouTube. To overcome this limitation, explore layer 7 protocol features and mangle, as detailed in the next sections. Stay with us to discover alternative methods for blocking websites on MikroTik.
Solution 2. Using Layer 7 Protocols (L7P) to Block Website
Exploring the second method to block websites on MikroTik, we delve into using Layer 7 Protocol. This section, for instance, guides you on blocking Facebook on MikroTik through Layer 7 Protocols.
Open the Layer 7 Protocols by following the path below;
- Click the IP>Firewall menu.
- Select the Layer 7 Protocols tab.
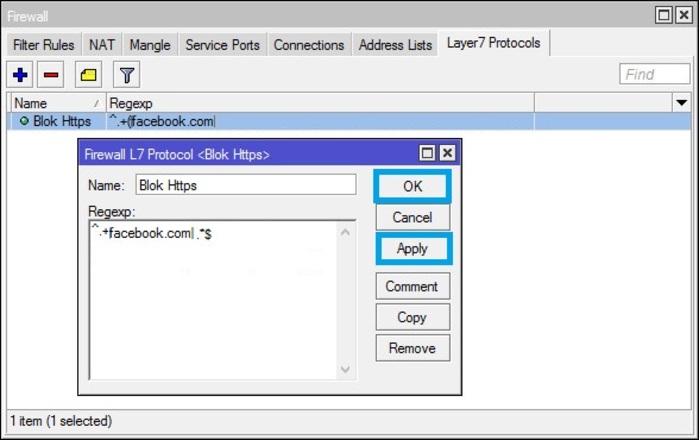
- Next, it is required to create and configure the L7P script. To do this:
- Click the + blue sign to open the new Firewall L7 Protocol window.
- In the name column, put the name of the script and Regexp. For example, to block Facebook, put ^.+(Facebook.com).*$ Regex in Regexp textarea input field.
- Click Apply and OK button.
- In order to block the websites you want to, you must use your own Layer 7 Protocols in Filter Rules, which you have established. So, the next action is to make our firewall filter rule.
 Now that you’ve created the L7P script, you’re prepared to generate filter rules to execute the L7P script. Follow the steps below:
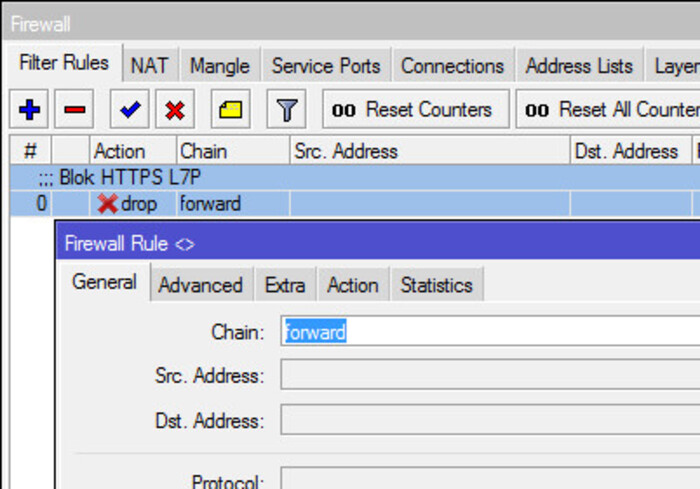
- Click the IP > Firewall menu on the Filter Rules tab.
- To create a new configuration, click the + sign.
- Fill in the chain forward column on the General tab.
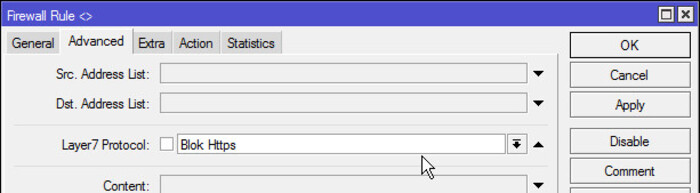
- In the Advanced Tab, input the name of the previously generated L7P script in the Layer 7 Protocols field.
In the screenshot below, choose “Drop” and click OK in the Action Tab.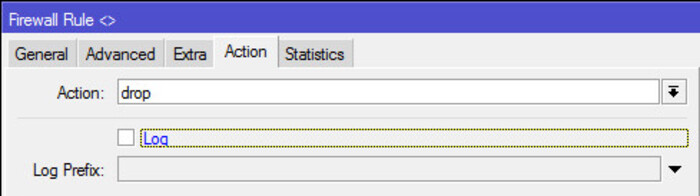
This method will effectively block access to Facebook on your PC.
Solution 3. Using Mangle to Block HTTPS
If you prefer not to use the two solutions above or if they don’t work on your system, you can employ this method, utilizing Mangle to create Filter Rules and block websites on MikroTik.
- First, you must create the Mangle Settings. Follow the below steps:
- Click the IP > Firewall menu.
- Select the Mangle tab.
- Click the + sign to create the setting.
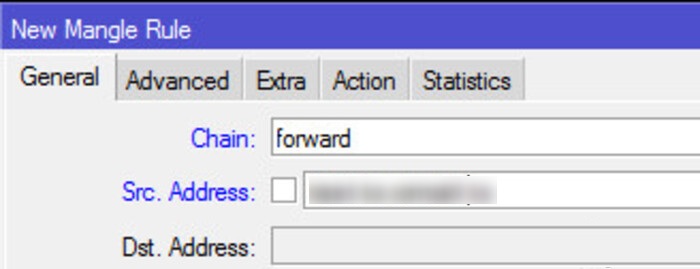
- Then, in the General tab:
- Fill the Chian with Forward.
- The SRC. Address List must be filled with the IP network that you consider blocking.
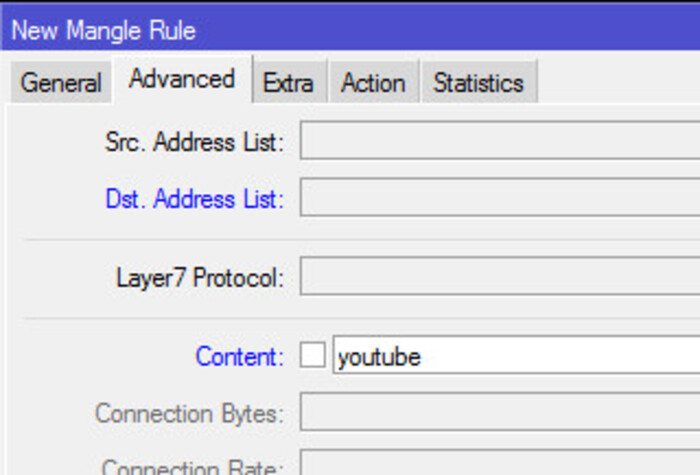
- In the Advanced tab:
- Put the name of the target website you need to block in the Content field.
- On the Action tab in Mangle:
- Fill in the action column with add to address list.
- Put in the Address list the name of the IP list for blocked sites.
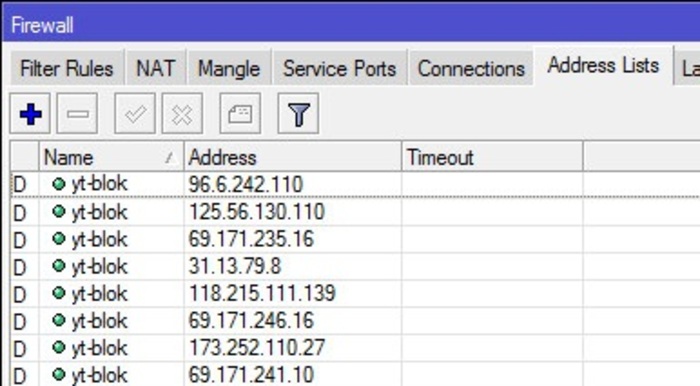
- Now, it is time to Check Address List.
- Access the blocked site and complete the loading process.
- Check in the proxy on the IP > Firewall menu > the Address List Tab.
Granting Access for Specific Users to Visit Blocked Websites
You’ve now acquired knowledge on blocking websites on MikroTik using three different methods. Through these methods, you’ve crafted a Filter Rule that restricts all users on your local area network (LAN). However, there may be instances when specific individuals need access to restricted websites, such as Facebook, YouTube, etc.
- In this part, you will learn How to allow a specific user to visit your restricted websites. Follow the below instructions to whitelist your preferred users to access blocked websites on Mikrotik:
- To add a new Filter Rule, select the Filter Rules tab and click the PLUS SIGN (+). A new window for firewall rules will now open.
- Select “forward” from the Chain dropdown menu in the General tab.
- In the Address input box, enter your user’s IP address, which will be permitted to visit websites that are prohibited.
- Select tcp from the Protocol dropdown menu by clicking on it.
- Put port 80,443 in Dst.Port input box.
- On the Advanced tab, Select the Layer7 Protocol dropdown menu to select the Layer7 Protocol that the user will be permitted to use.
- On the Action tab, choose accept from the Action dropdown menu.
- Click Apply and OK button.
Explore more; Guard your Microsoft account from attackers
For more updates follow us on Meta, X, Instagram.