Let’s dive into the process of paralysing “Windows Firewall “.

Firewalls, with their innate ability to regulate the ebb and flow of network traffic, bestow upon your system an exquisite layer of security. They stand as stalwart guardians, shielding your precious domain from the clutches of unauthorized access, malicious malware, and a myriad of potential security threats. It is a well-established truth that disabling these formidable protectors is ill-advised, for it compromises the very essence of security. However, there exist rare instances, like a fleeting whisper in the wind, where specific scenarios may necessitate the temporary suspension of your firewall’s watchful gaze.
Consider, for instance, a scenario where the firewall, in its zealous pursuit of safeguarding your system, inadvertently obstructs the installation of third-party software. Such a predicament, intertwined with the software’s intricate workings, may give rise to a discordant symphony of conflicts and impede the vital flow of Remote Desktop Protocol (RDP) connections. These unfortunate circumstances, entwined with network connectivity issues, demand the delicate act of disabling the Windows firewall. In doing so, a glimmer of hope emerges, as this act of temporary disablement becomes a beacon of light, guiding us towards the resolution of network and system tribulations.
Within the confines of this article, we shall embark upon a journey, unveiling the methods by which the Windows firewall may be gracefully silenced, if only for a fleeting moment.
- Using Windows Security
- Using Control panel
- Using Group Policy Editor
- Using Command Prompt
- Using Powershell
- Using Registry Editor
Why Disable Windows Firewall?
Protecting your system and data against threats and unwanted intrusions is crucial, and the firewall is one of the fundamental security measures to achieve this. Luckily, Windows offers top-notch firewalls to enhance its system security. However, some users opt for third-party firewalls to prioritize safety. But, there are times when temporarily disabling the Windows firewall can help troubleshoot system and network issues. Let’s explore the scenarios where this can be a solution.
Firewall Interference with Software
In some cases, the firewall may interfere with third-party software or specific older applications, preventing them from running and functioning correctly. In order to use or test particular programs, you may need to turn off the firewall temporarily.
Network Troubleshooting
In certain situations, temporarily disabling the Windows firewall can be useful for detecting and resolving network issues. This allows you to determine whether the firewall is causing network problems and connectivity issues. In this case, you can troubleshoot network issues more quickly.
Conflicts with Security Software
Sometimes, there can be an incompatibility between the security software and the firewall, which is rare but not impossible. To resolve such conflicts and discrepancies for troubleshooting purposes, disabling the firewall is a good solution.
Security Audits or Assessments
One method to assess a system’s security status and test vulnerabilities is temporarily disabling the firewalls. However, it’s essential to consider a secure and controlled environment for this action to avoid irreparable damages.
1. Disabling Windows Firewall Using Windows Security
The simplest method to turn off Windows firewall in Windows 11 and 10 is by using Windows Settings. Follow the steps below to disable the Windows firewall through Windows Security:
- Press the “Win + I” keys on the keyboard to open Windows Settings.
- Find the “Update & Security” option and click on it.
- Launch “Windows Security” from the left pane menu.
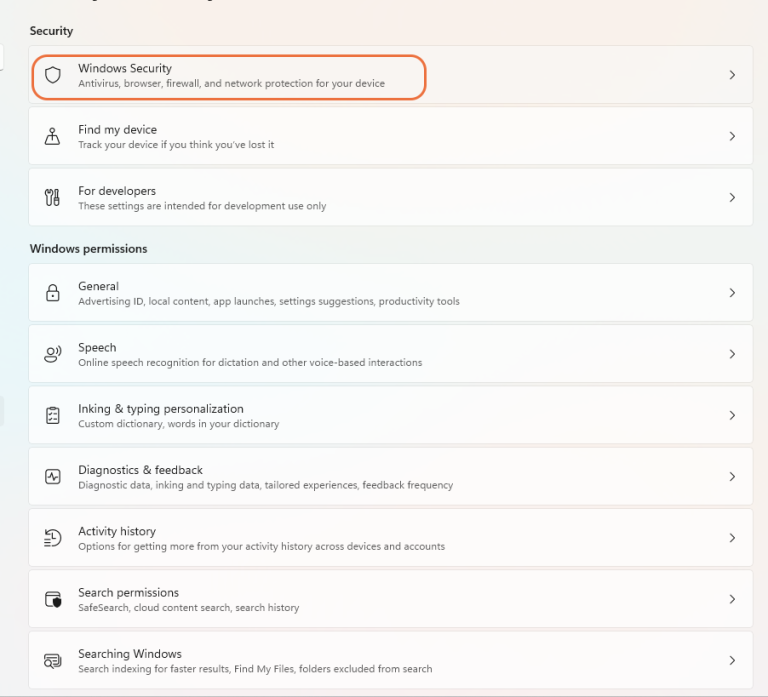
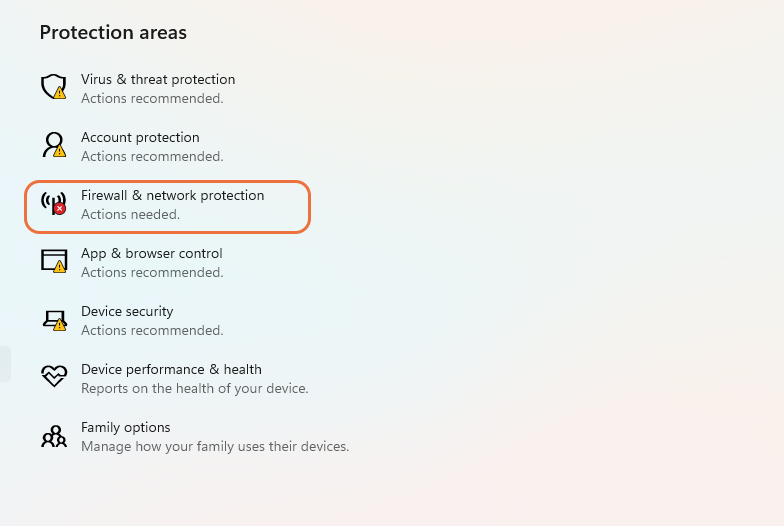
4. Click on “Firewall & network protection.”
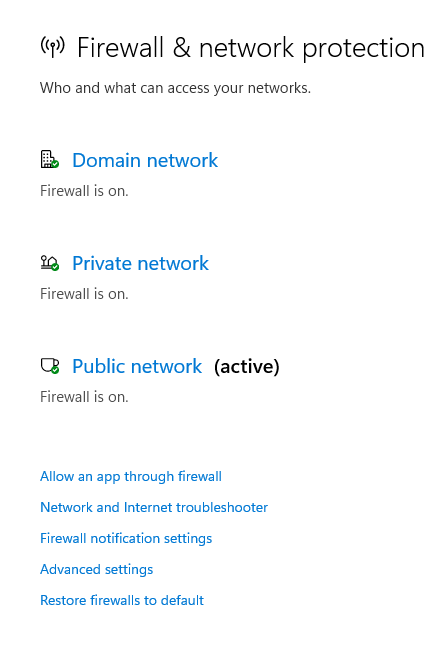
5. Under “Windows Defender Firewall,” toggle off the switch for Domain network, Private network, and Public network.
2. Disabling Windows Firewall via Control Panel
To turn off the Windows Firewall in Windows 10 & 11, you can use the Control Panel. Follow these steps to achieve this:
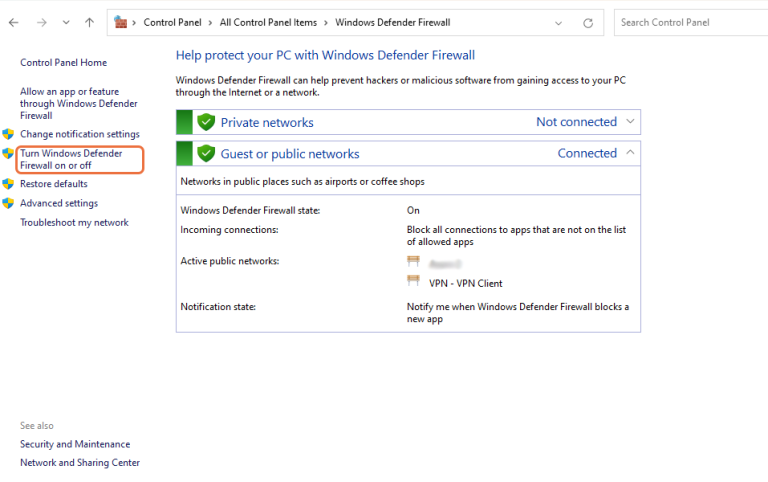
- Access Control Panel: Search for Control Panel in the Start menu and launch “Windows Defender Firewall” by clicking on it.
- Turn off the Firewall: In the left-hand menu, click “Turn Windows Defender Firewall on or off“. Then, check the option “Turn off Windows Defender Firewall (not recommended)” for both private and public network settings.

3.Turning off the Windows Firewall Using Group Policy Editor
Did you know that there’s another way to disable the default Windows firewall besides the Windows Defender Firewall? It’s called the Group Policy Editor, and it’s available on Windows Server versions, as well as Windows Professional and Enterprise. With the Group Policy Management Console, you can easily manage various settings in Windows. But if you’re using Windows 10 or Windows Home Edition, you’ll need to download and enable the Group Policy Editor first. Trust us, it’s worth it! Enabling the Group Policy Editor gives you access to valuable advantages for configurations and other settings. So, if you haven’t enabled it yet, we highly recommend doing so as soon as possible. Once you’ve enabled the Group Policy console, follow the steps below to take full advantage of its features.
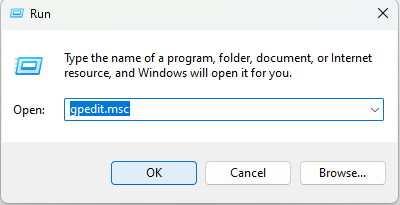
1. Right-click on the Windows Start menu and click on the “Run” option from the menu. In the Run window, type “gpedit.msc” in the dialog box and press Enter to launch the Group Policy Editor.
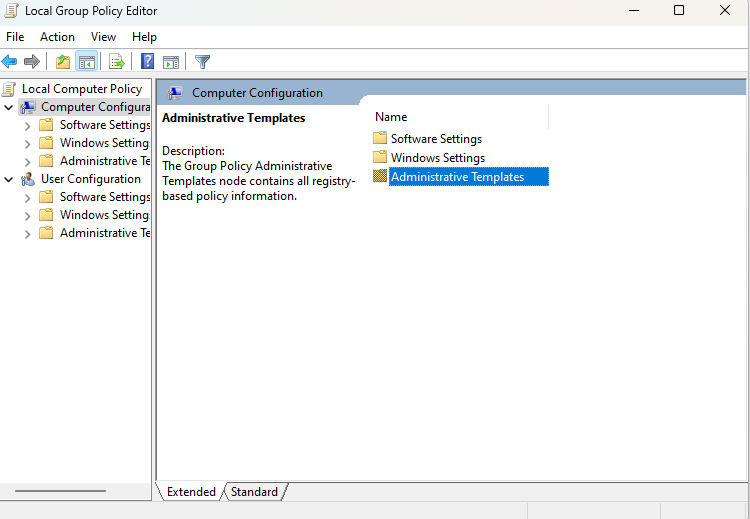
2. . In the Group Policy Editor window, select the “Computer Configuration” option from the left menu, and from the right-side menu, click “Administrative Templates“.
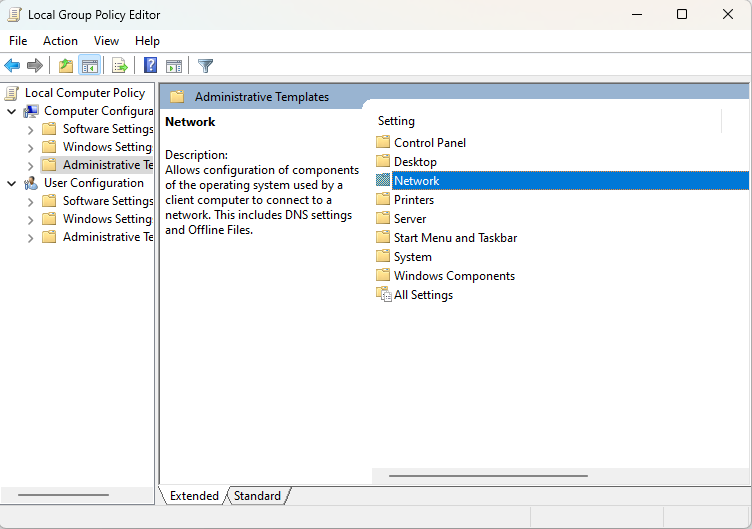
3. Then navigate to Network > Network Connection.
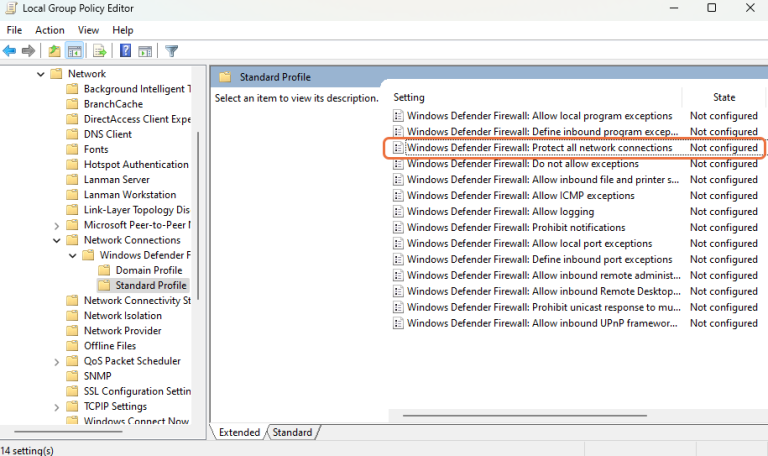
4. Choose “Windows Defender Firewall” and then “Standard Profile“.
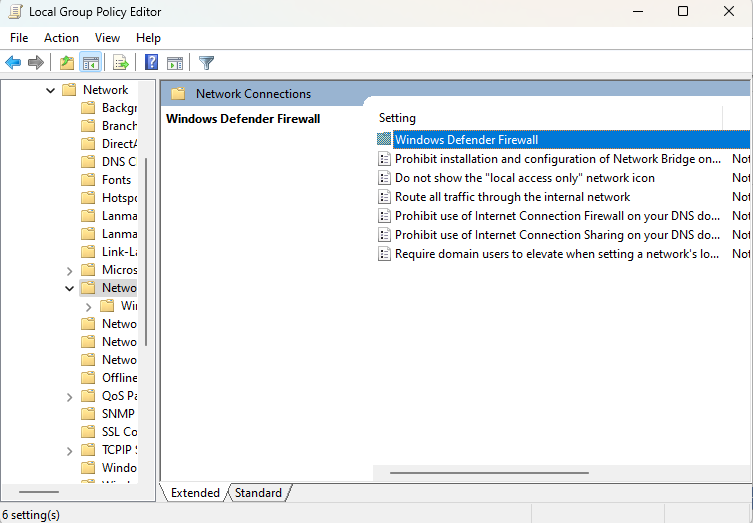
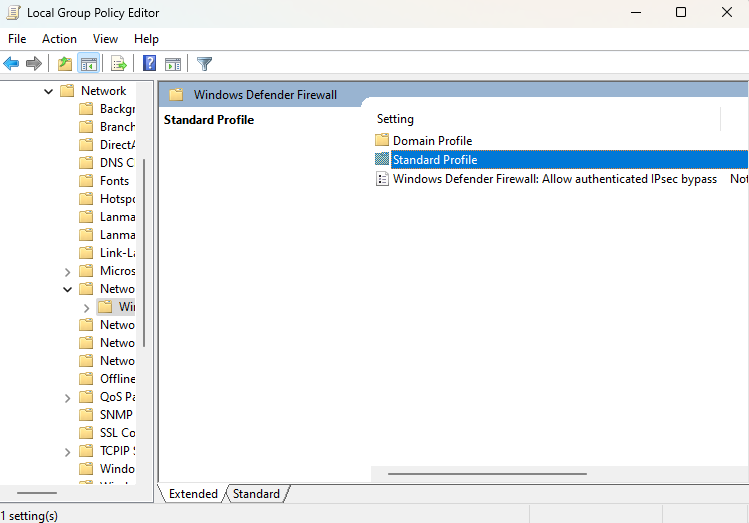
5. In the right menu, find the “Windows Defender Firewall: Protect all network connections” option and double-click on it.
6. Check the “Disabled” option in the dialog box that appears.
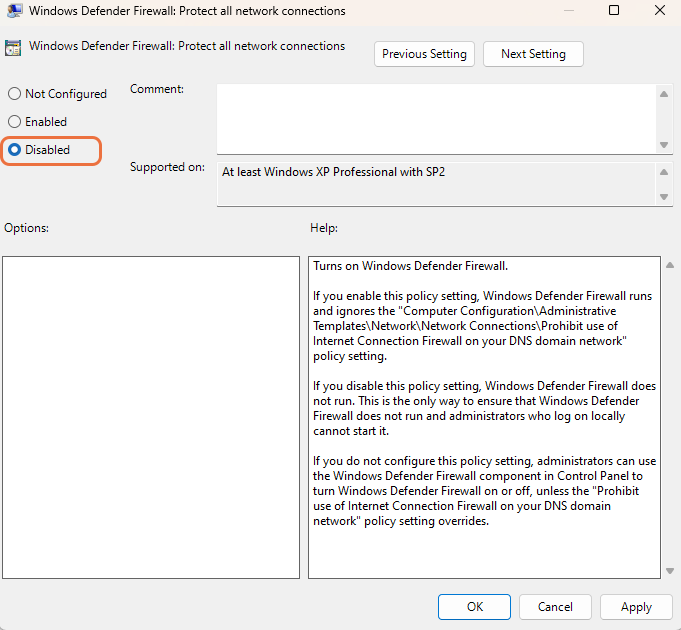
7. Save your changes by selecting Apply and then OK.
8. To apply your changes, we recommend restarting your Windows system.
As a result, you could permanently disable Windows firewall (Windows 10) by using Group Policy.
4. Disabling Windows Firewall via Command Prompt
A wide range of users prefer to apply settings through the command line; of course, this depends on the users’ knowledge, expertise, and interest. Windows users can disable the Windows Firewall using Command Prompt. Follow the instructions in this section of the article to turn off the Windows 10 and 11 firewall through the Windows command line:
1. Open Command Prompt as Administrator: Search for “Command Prompt” in the Start menu and right-click on it. Then, click on the “Run as administrator” option. Alternatively, you can use the shortcut (Winkey) + R keys and type cmd in the dialog box to launch Command Prompt.
2. Disable Firewall for Domain Profile: To turn off the firewall for domain profile, execute the following command and press Enter:
netsh advfirewall set domainprofile state off
3. Disable Firewall for Private Profile: To turn off the firewall for private network profile, use the following command and then press Enter:
netsh advfirewall set privateprofile state off
4.Disable Firewall for Public Profile: To disable the firewall for public profile, type the following command:
netsh advfirewall set publicprofile state off
5. Turning off the Windows Firewall using PowerShell
Some users prefer using Windows PowerShell to manage various settings in Windows. Fortunately, disabling the Windows Firewall through PowerShell is also possible. To turn off the firewall in Windows, you can use the Set-NetFirewallProfile cmdlet. Follow the instructions below to disable the firewall for a specific network profile (e.g., Domain, Private, or Public):
1. Open PowerShell as Administrator: Search for PowerShell in the Start menu, right-click on it, and select “Run as administrator” from the menu.
2. Disable Firewall for the Domain Profile: Run the following command to turn off the firewall for the domain profile:
Set-NetFirewallProfile -Profile Domain -Enabled False
3. Disable Firewall for the Private Profile:To turn off the firewall for the Private Profile, use the following command:
Set-NetFirewallProfile -Profile Private -Enabled False
4.Disable Firewall for the Public Profile: To disable the firewall for the Public Profile through PowerShell, the following command is useful:
Set-NetFirewallProfile -Profile Public -Enabled False
6. Disabling Firewall in Windows using Registry Editor
Registry Editor is a powerful feature in Windows used by experienced users to modify various settings. Registry Editor is also used to disable the Windows Firewall in Windows 10/11. However, this method is not recommended for novice users, as any unintended changes in Registry Editor can result in system instability, complete Windows failure, and significant security risks to your system and network. Therefore, use Registry Editor carefully for firewall settings changes, and do not make changes in other settings. To disable the firewall using the Registry Editor, follow the steps below:
1. Make a backup copy of Windows Registry Editor to restore data and Windows settings.
2. Run Registry Editor.
3. Navigate to Computer\HKEY_LOCAL_MACHINE\SOFTWARE\Policies\Microsoft\WindowsFirewall\StandardProfile path in the Registry Editor management console.
4. Select “New” and “DWORD (32-bit) Value” by right-clicking on StandardProfile.
5. In the Edit DWORD (32-bit) Value window, fill the Key name field with EnableFirewall and enter the value 0 for the Value data field.
6. Click “OK” to save your changes after completing the previous steps.
Then, close the Registry Editor and restart your Windows system to disable the Windows firewall.
Explore More; 7 Best Windows VPS Providers in 2023
Get Connected with us on Facebook, Twitter, Instagram.