How to Install SSH Server on Windows VPS
An SSH (Secure Shell) server provides secure remote access and allows you to manage your Windows VPS from any location. Although the “OpenSSH SSH Server” role is not available in the Server Manager for Windows, you can still install an SSH server using alternative methods. In this guide, we will walk you through the process of installing an SSH server on your Windows VPS. Let’s get started!
Step 1: Choose an SSH Server Software:
There are several SSH server software options available for Windows. For the purpose of this guide, we will use OpenSSH, which is a widely used and reliable option.
Step 2: Download OpenSSH for Windows:
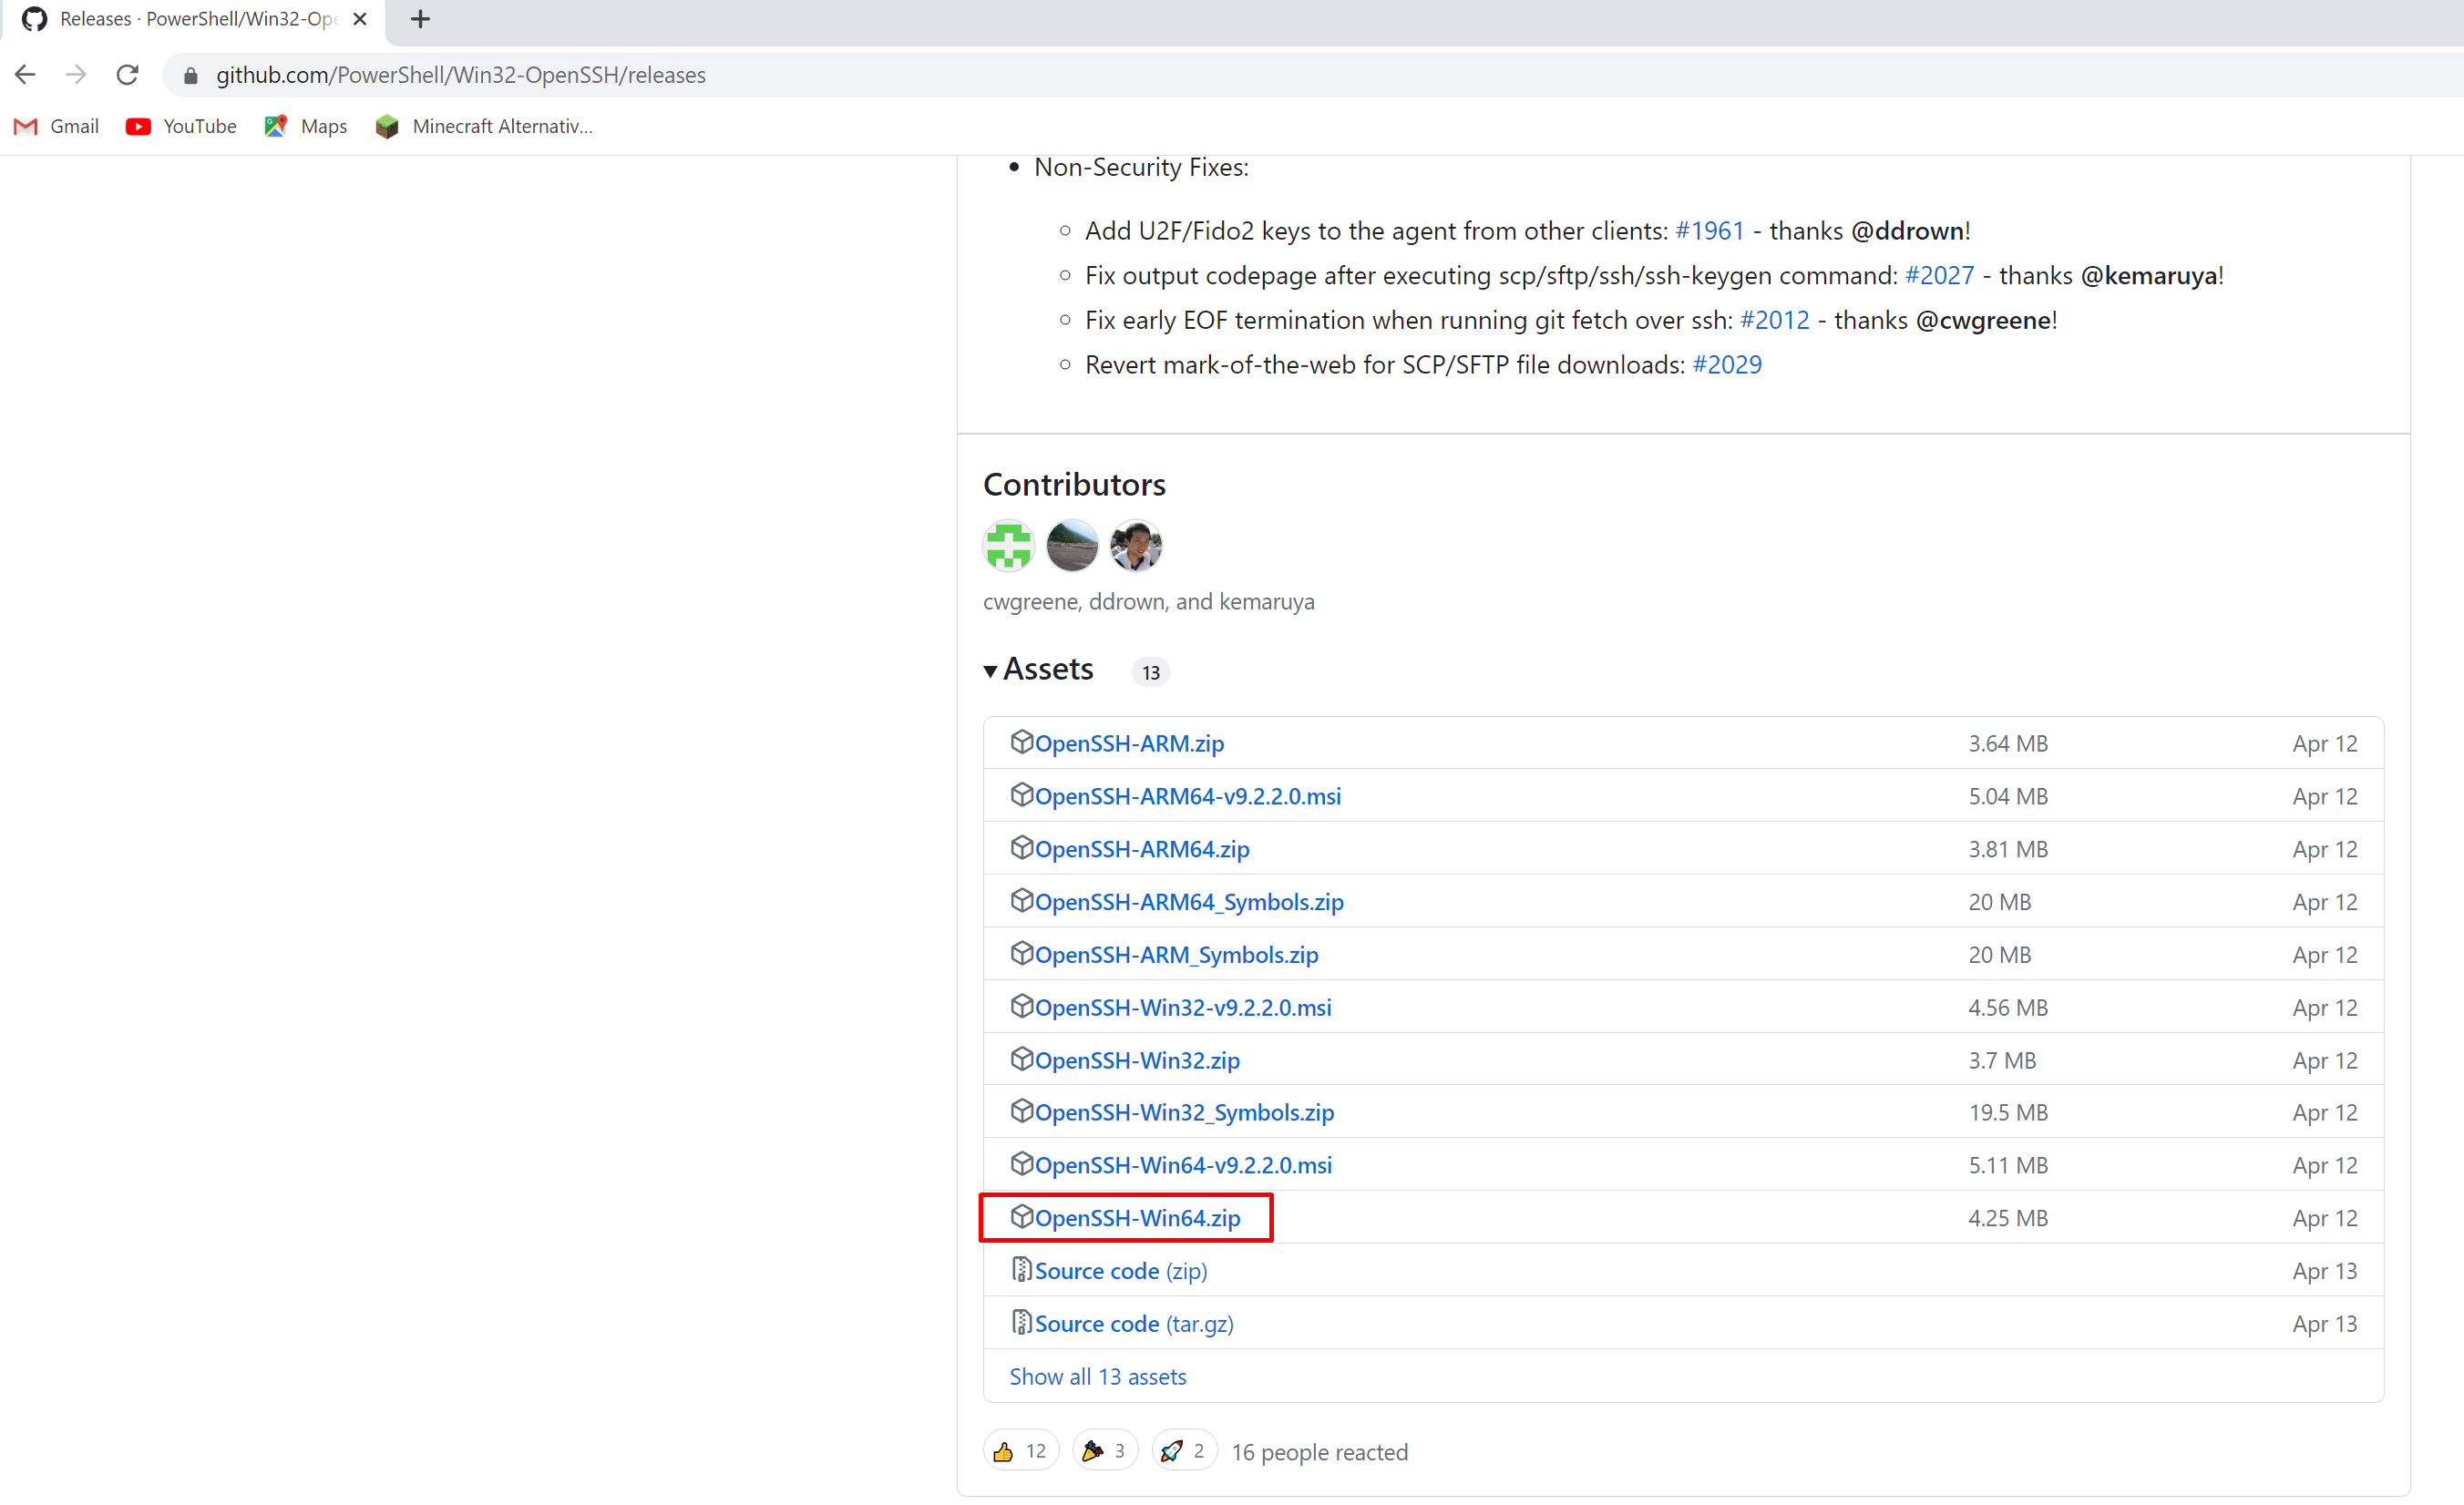
Visit the official OpenSSH website or a trusted source to download the OpenSSH server package for Windows. Look for the appropriate version that matches your Windows environment (32-bit or 64-bit). – Download
Step 3: Extract the OpenSSH Package:
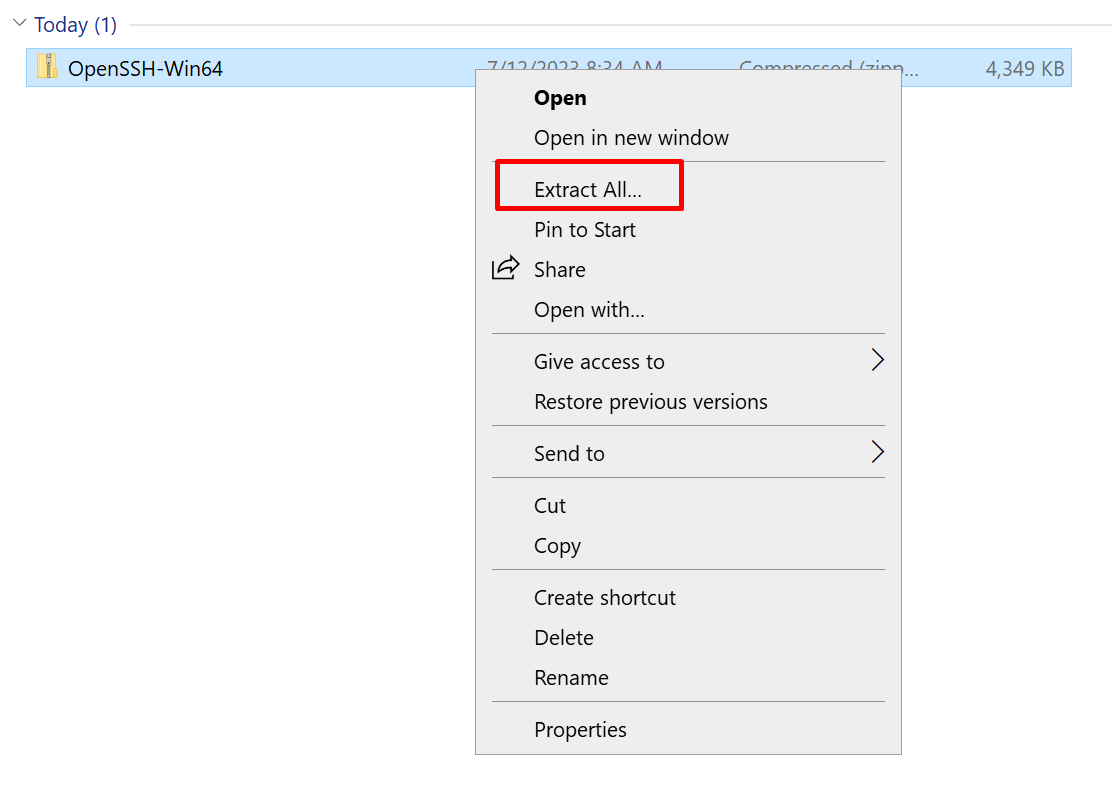
After downloading the OpenSSH server package, extract the contents to a directory of your choice. For example, you can create a folder named “C:\OpenSSH” and extract the files there.
Step 4: Install OpenSSH Server:
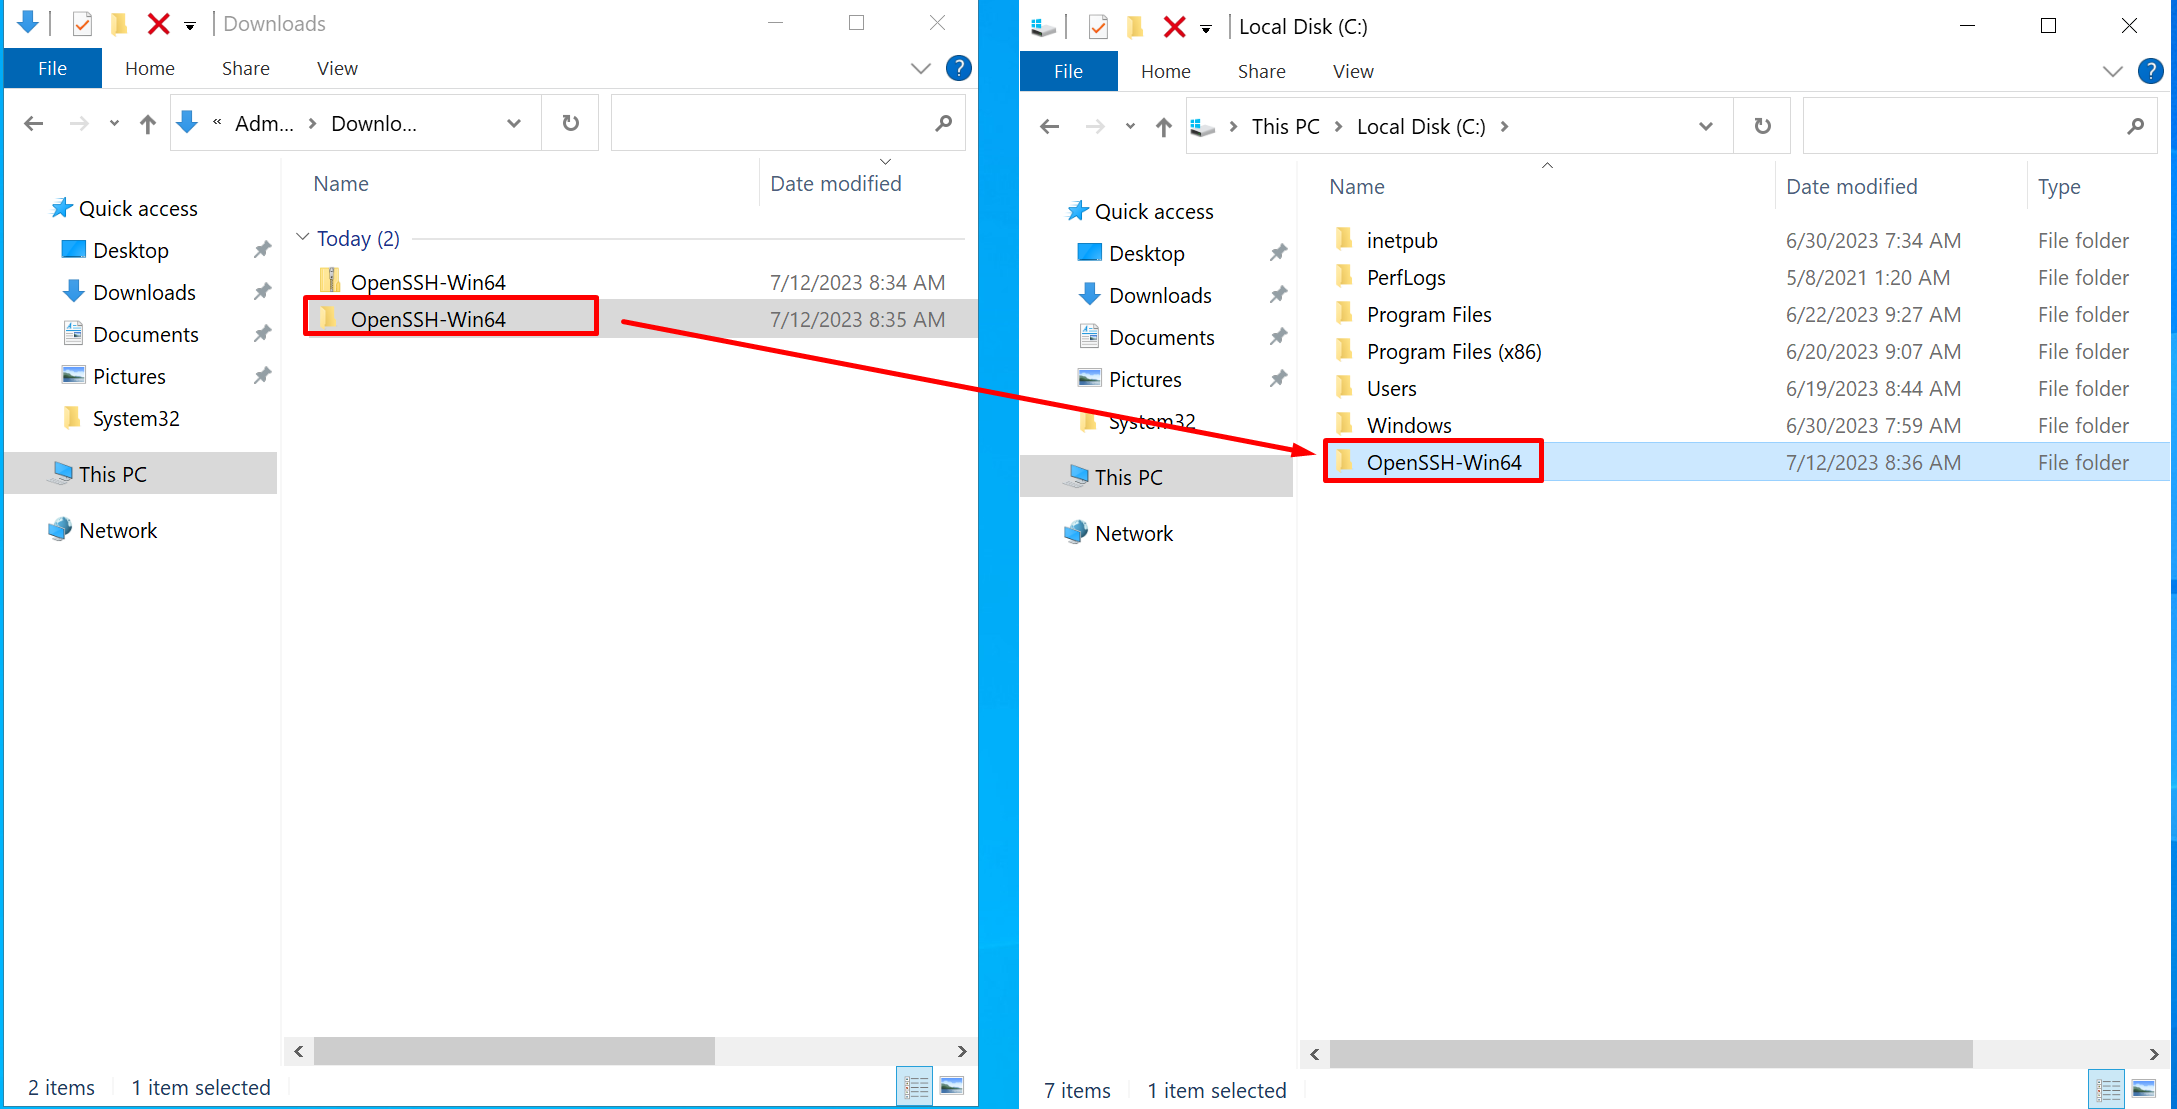
To install OpenSSH as a Windows service, follow these steps:
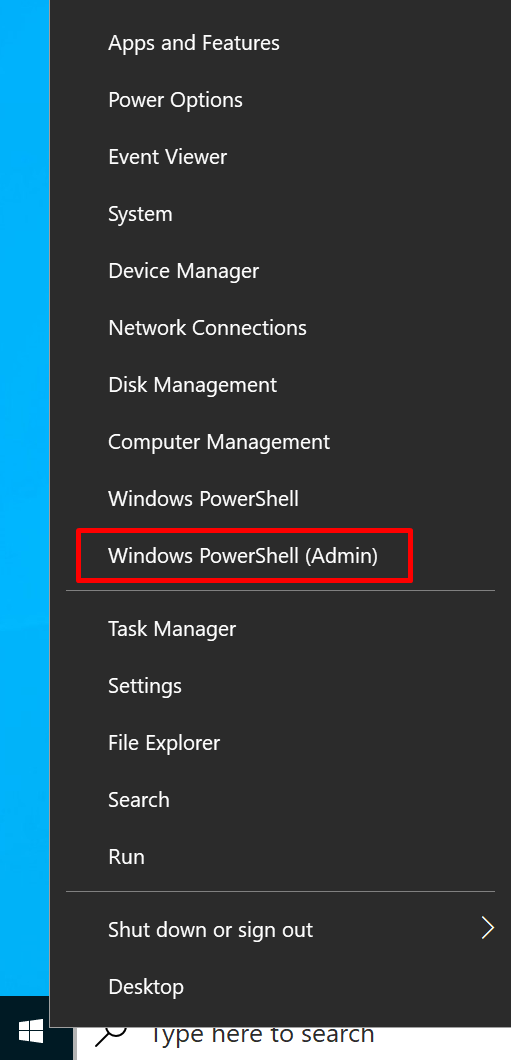
1. Open a PowerShell or Command Prompt window with administrative privileges.
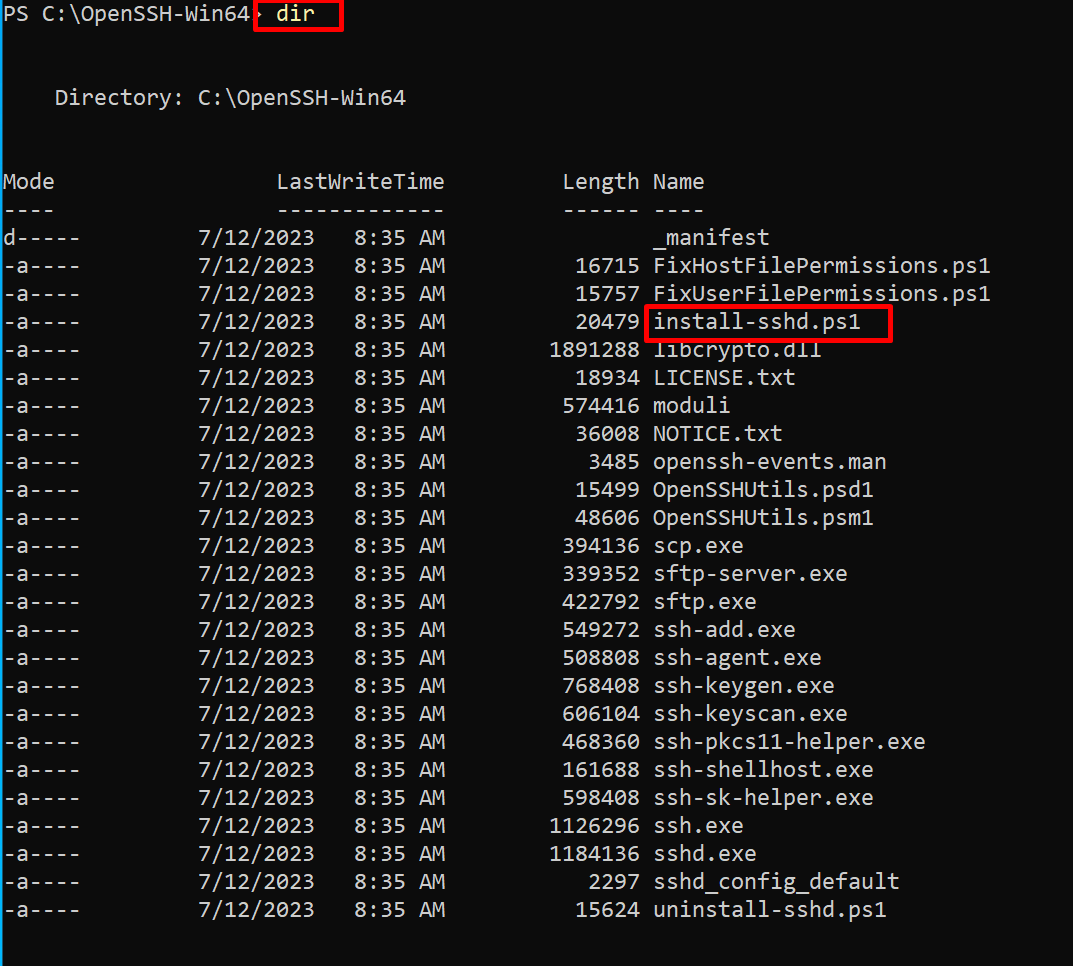
2. Navigate to the directory where you extracted the OpenSSH package. For example, enter:
“`
cd C:\OpenSSH
“`

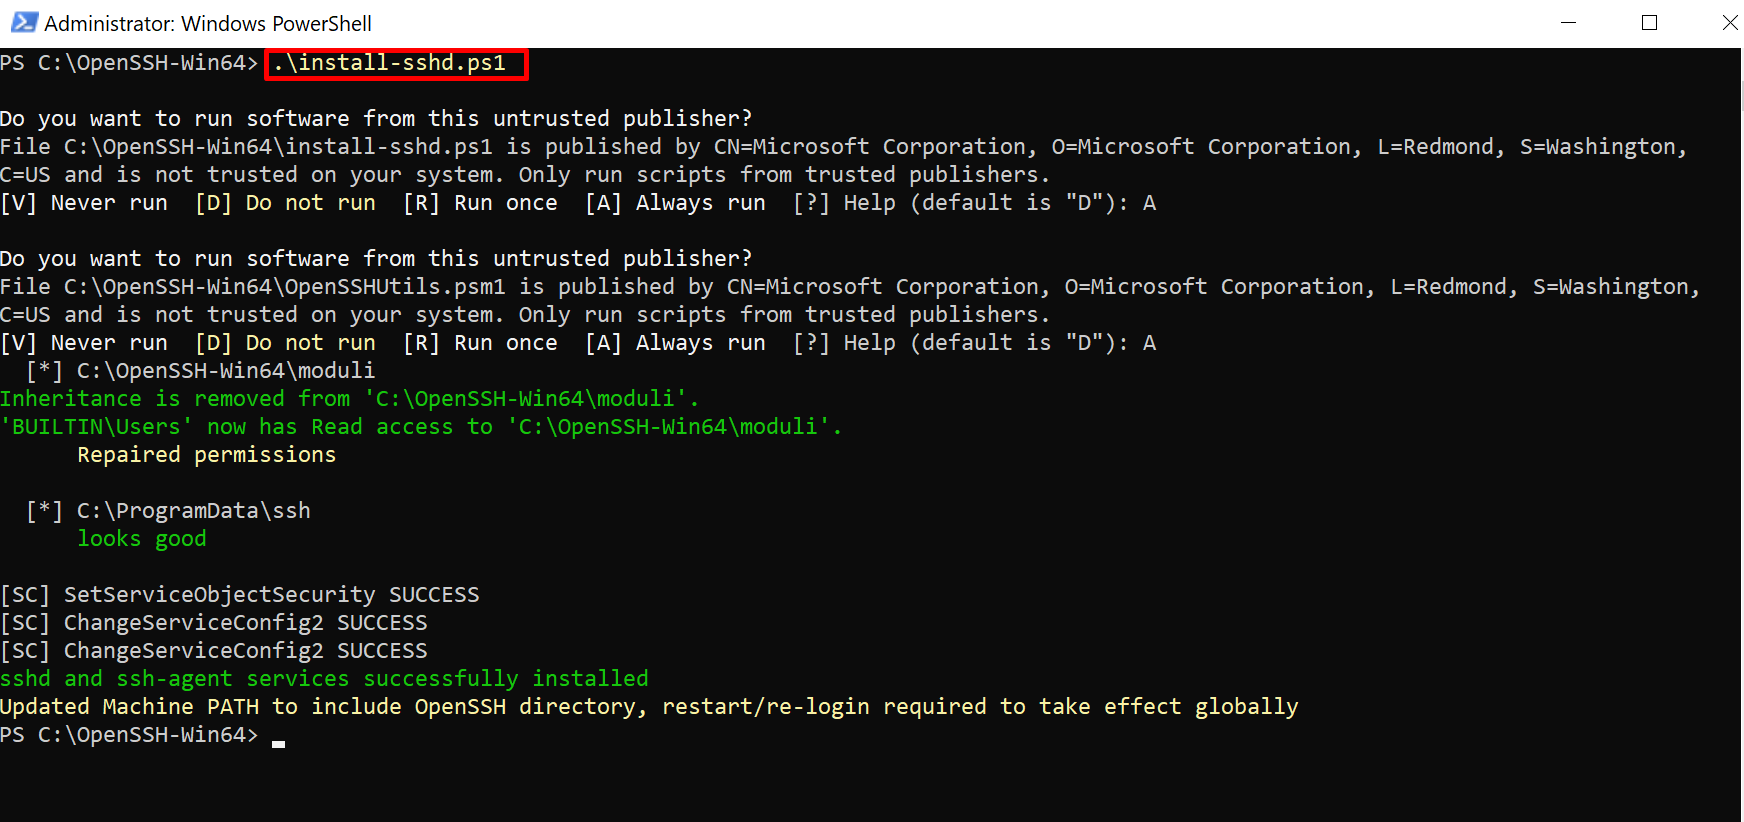
3. Run the following command to install the OpenSSH server:
“`
powershell.exe -ExecutionPolicy Bypass -File install-sshd.ps1
“`
Step 5: Configure OpenSSH Server:
After the installation is complete, you need to configure the OpenSSH server:
1. In the same PowerShell or Command Prompt window, run the following command to generate the necessary server keys:
“`
.\ssh-keygen.exe -A
“`

2. Open the Windows Services Manager. You can search for “Services” in the Start menu.
3. Locate the “OpenSSH SSH Server” service and start it. You can also set it to start automatically on system startup.
Step 6: Adjust Firewall Settings:
To allow incoming SSH connections, you need to configure the Windows Firewall to allow SSH traffic:
1. Open the Windows Firewall with Advanced Security. You can search for “Windows Firewall with Advanced Security” in the Start menu.
2. Click on “Inbound Rules” in the left pane.
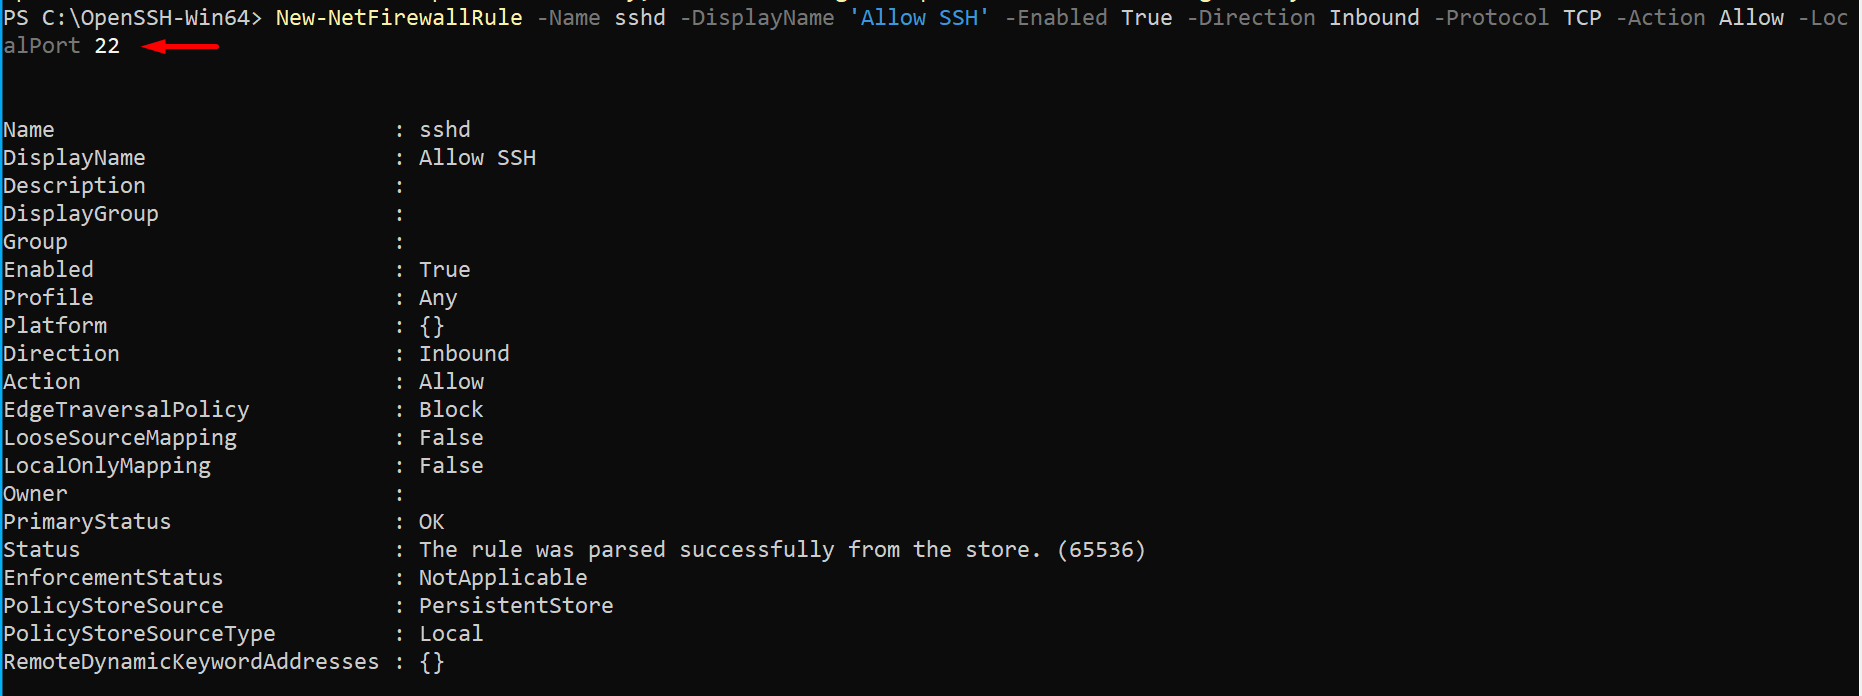
3. Create a new inbound rule to allow SSH traffic on port 22. Specify the rule to apply to TCP connections and allow the connection for the desired network profiles.
Step 7: Test the SSH Server:
Now that you have installed and configured the SSH server, it’s time to test the connection:
1. Open an SSH client application on your local machine, such as PuTTY (for Windows) or OpenSSH (for Linux/macOS).
2. Enter the IP address or hostname of your Windows VPS and the SSH port (default is 22).
3. Provide your Windows account username and password when prompted.
4. If the connection is successful, you should be logged into your Windows VPS via SSH.
Although the “OpenSSH SSH Server” role is not available in the Server Manager for Windows, you can still install an SSH server on your Windows VPS using alternative methods. By following the steps outlined in this guide, you can set up an SSH server and securely manage your Windows VPS from any location. Enjoy the benefits of secure remote access!
Install SSH Server on Windows VPS (FAQ)
Can I use a different SSH server software instead of OpenSSH on my Windows VPS?
Yes, there are alternative SSH server software options available for Windows, such as Bitvise SSH Server and WinSSHD. While this guide focuses on installing OpenSSH, you can choose a different SSH server software that meets your requirements and follow their respective installation and configuration instructions.
Is it necessary to open port 22 for SSH connections on the Windows Firewall?
By default, SSH connections typically use port 22. However, for security reasons, you may consider using a different port number for SSH. If you decide to use a different port, ensure that you adjust the Windows Firewall settings accordingly and allow incoming connections on the chosen port.
Can I use SSH key-based authentication instead of a username/password for Windows VPS access?
Yes, SSH key-based authentication is a more secure method compared to using a username and password combination. To use SSH key-based authentication on your Windows VPS, you need to generate an SSH key pair on your local machine and copy the public key to the server. Then, configure the SSH server to allow key-based authentication and disable password authentication. This method adds an extra layer of security to your SSH connections.
Are there any additional security measures I should consider when using an SSH server on my Windows VPS?
-
Yes, besides the basic installation and configuration steps, it is crucial to follow security best practices for your SSH server. Here are a few recommendations:
- Regularly update your SSH server software to ensure you have the latest security patches.
- Implement strong and complex passwords for user accounts on your Windows VPS.
- Consider using a firewall or network security group to limit SSH access to trusted IP addresses or networks.
- Monitor your SSH logs for any suspicious activity or unauthorized login attempts.
- If possible, disable root or administrator-level SSH access and use a non-privileged user account for SSH connections.
