Installing Home Assistant on a Pi Zero 2W
Smart devices sound great—until reality kicks in. Each gadget demands its own app, creating chaos when you try to monitor or control them. That’s exactly what I faced:
- A few security cameras from one brand
- Plans to add Wi-Fi bulbs from another
The thought of juggling multiple apps? It was overwhelming. That’s when I discovered Home Assistant—a powerful solution that brings all smart devices, regardless of brand, under one dashboard.
I had three clear goals in mind:
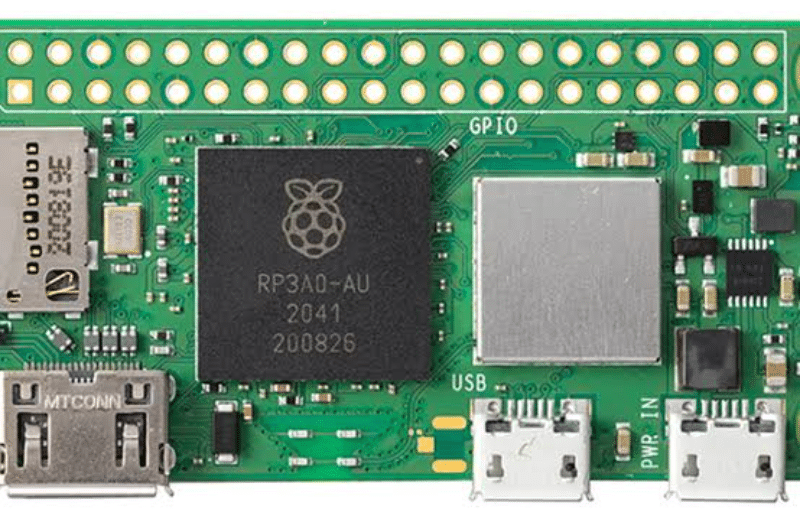
- Run Home Assistant on a compact, budget-friendly device—my Raspberry Pi Zero 2W
- Connect it to my home network for seamless access via phone or PC
- Ditch the clutter of brand-specific apps and enjoy a unified smart home control
Honestly, I was skeptical. The Pi Zero 2W is tiny, with limited resources, but I wanted to see what it could handle. Surprisingly, the results exceeded my expectations!
In this post, I’ll share:
- How I set up Home Assistant on the Pi Zero 2W
- The challenges I faced
- What worked, what didn’t, and why it’s worth a try for your smart home
Let’s dive in!
Initial Hurdles
Picking the Right Version
Setting up Home Assistant on a Raspberry Pi Zero 2W isn’t as simple as it sounds—especially when it comes to choosing the right version. Here’s what I faced:
- Home Assistant offers multiple versions, and the official OS image works smoothly on Pi 3, 4, and 5.
- No official support for Pi Zero 2W: That was the first red flag. Home Assistant dropped support for Pi Zero in version 7.
- After some research, I found that version 6.6 included support for the original Pi Zero. Many users reported success flashing this version onto the Pi Zero, so I figured it might work for my Pi Zero 2W too.
Here’s the step-by-step process I followed:
- Flashed Home Assistant 6.6 onto the SD card using Balena Etcher.
- Before flashing, I backed up my Raspberry Pi OS with the SD card copier utility, storing it safely on a USB drive.
- I added a network configuration file to help the Pi connect to my home Wi-Fi.
- I inserted the SD card into my Pi Zero 2W and waited for the magic to happen.
But the magic never came.
- The Pi’s LED light never turned on.
- The Pi refused to boot Home Assistant OS.
- I tried multiple file tweaks and modifications—nothing worked.
Determined to find a workaround, I tried flashing the Pi 3 B+ image onto the Pi Zero 2W.
Unfortunately, the result was the same: no boot, no Home Assistant, no success.
These hurdles taught me a lot—and the next steps revealed the real solution. Stay tuned as I share how I overcame these challenges in the next section.
DietPi to the Rescue: A Shimmer of Hope
When direct installation of Home Assistant OS on the Pi Zero 2W hit a dead end, I knew it was time to pivot. Here’s how DietPi saved the day:
- Switched the approach: Instead of forcing Home Assistant OS onto the Pi, I opted for DietPi—a super-lightweight, non-GUI operating system.
- Why DietPi? It supports Debian Bookworm, the latest version of Debian, making it an ideal choice for low-powered devices like the Pi Zero 2W.
- Flashing DietPi onto the Pi was smooth—no issues at all. I quickly configured the wireless connection and completed the basic setup.
Installing Home Assistant on DietPi
With DietPi up and running, I moved on to installing Home Assistant. Here’s what I did:
- Launched the dietpi-software utility—DietPi’s handy tool for managing software installations.
- Searched for Home Assistant and selected it from the list of supported software.
- Initiated the installation, which set up a dedicated Python environment for Home Assistant.
- Waited (and waited…)—the installation took more than an hour to complete.
After a long afternoon, I was thrilled to see the Home Assistant service running on the Pi. It felt like a major win!
Accessing the Home Assistant Dashboard
The next step was to access the Home Assistant web dashboard:
🔎 Checked the Pi’s IP address using the terminal.
🌐 Entered the IP in the browser, followed by —the default Home Assistant port.
😬 But the dashboard didn’t load.
I stared at the screen, wondering: What went wrong after all this effort?
Applying Final Touches: Patience is the Key
After the initial setbacks, I decided to take a step back, troubleshoot systematically, and give it one more shot. Here’s how I applied the final touches and got Home Assistant running smoothly:
- Double-checked network configuration: Ensured the DietPi’s Wi-Fi settings matched my router’s details perfectly—any typo could block access.
- Reviewed Home Assistant logs: Ran
journalctl -u home-assistanton the Pi to identify any errors or failed dependencies. - Installed missing packages: Realized some Python dependencies were missing, so I manually installed them using
pip. - Restarted services patiently: Instead of rushing, I gave the Pi time to fully boot and restart the Home Assistant service using
sudo systemctl restart home-assistant.
Finally, with everything aligned:
🌐 I opened the browser, entered the Pi’s IP followed by—and Home Assistant loaded like a charm.
🎉 The dashboard came to life, showing all connected devices and automations in a single, clean interface.
The key takeaway? Patience and persistence paid off. Sometimes, all it takes is a little extra effort to make things click—especially when working with limited hardware like the Pi Zero 2W.
Home Assistant’s Ready—But Not All of It
After the initial account creation and basic setup, I finally reached the Home Assistant Overview tab. Here’s what I encountered:
- The dashboard displayed my router and a few other detected devices.
- I expected to see my two Xiaomi security cameras—but they were missing from the list.
Here’s how I tackled the missing integrations:
- Checked the Integrations section in Home Assistant, hoping to find Xiaomi support.
- Found nothing related to my cameras—this was a setback.
- Installed HACS (Home Assistant Community Store)—a game-changer for adding custom integrations.
- Through HACS, I found the right Xiaomi plugins and successfully added both cameras to my Home Assistant dashboard.
- With the cameras connected, I could finally monitor and control them through a single, unified interface.
🔒 Important note:
To use HACS, you must have a GitHub account—it’s non-negotiable. Without it, HACS won’t function, and you’ll miss out on a wide range of community plugins.
💡 First impressions:
The granular settings, automations, and options initially felt overwhelming. But with time, I grew familiar with the system, step by step.
Just as things started falling into place, I decided to set up remote access for my Home Assistant—and that’s where I hit another roadblock.
No Add-ons Support: It’s the Core Version
While setting up remote access for Home Assistant, I hit a significant limitation:
- Tailscale—a fantastic add-on for remote access—works only with specific Home Assistant versions.
- Unfortunately, my Raspberry Pi Zero 2W runs the Core version, which doesn’t support add-ons.
Here’s a quick breakdown of the situation:
- Home Assistant Core:
- Lightweight, ideal for limited hardware
- Lacks add-ons support, including Tailscale
- Home Assistant OS:
- Offers full add-ons support
- Not officially available for the Pi Zero 2W
- Home Assistant Supervisor:
- Supports add-ons like Tailscale
- Tried installing it, but faced hurdles I couldn’t overcome—yet.
💡 The reality:
For the Pi Zero 2W, a complete Home Assistant OS experience isn’t possible. While the Core version works fine for basic functionality, you lose access to add-ons that simplify tasks like remote access, backups, and advanced integrations.
Performance: It’s Not Much, But It’s Okay
Running Home Assistant Core on the Pi Zero 2W wasn’t as bad as I expected. Here’s how it performed:
- Lightweight setup: Since I don’t have many devices connected or complex automations, the Core version didn’t eat up too many resources.
- Resource usage:
- A quick look at the resource monitor showed around 65% memory usage on the Pi.
- The digital hardware monitor integration in Home Assistant confirmed this.
- Smooth UI experience:
- No freezes, no crashes, and no lag when navigating the Home Assistant interface.
- The web UI loaded instantly on both my desktop and phone.
- Device settings responded immediately when tweaked.
- Limitations with cameras:
- My Xiaomi cameras don’t support RTSP, so I couldn’t pull up the live camera feed in Home Assistant.
The Verdict: Not the Best Pick
While the Pi Zero 2W handled the Core version well for basic setups, it’s not the best option for more advanced Home Assistant configurations. If you plan to add many devices, heavy automations, or real-time camera feeds, you’ll likely face performance bottlenecks.
For now, my setup works fine, but I know I’ll need to upgrade if I want to push Home Assistant to its full potential.
EXPLORE MORE; How to Install Portainer on Raspberry Pi 5

READ OUR BLOGS .