
Teamspeak 3 is software that is particularly popular with gamers and is used intensively. In the gaming community, Teamspeak 3 is one of the best VoIP Platforms for gaming Users. In this article – How to Setup a TeamSpeak 3 Server on Windows, we will explain what the program Teamspeak 3 can do and when you need it and how to Setup Teamspeak 3 in a simple way.
Before we starting a setup for TeamSpeak 3, we will go through some backgrounds of TeamSpeak 3. As you have seen before that TeamSpeak is VoIP Software so let’s start with VoIP Software.
– Short info about VoIP –
VoIP stands for Voice-over-IP and describes voice communication over Internet-based networks. VoIP is one of those technologies that can make everyday situations easier or make work processes more efficient: the best prerequisites for decisively changing the future of telephony.
In the course of the phasing out of the traditional telephone systems, which established their connections in a classic way via the copper cables of the fixed network, many new possibilities for telecommunications have emerged with VoIP.
What is TeamSpeak 3?
Teamspeak (TS is, as the name (Team = English for team and Speak = English for speaking) suggests, a software that is optimally designed to communicate with each other in a large group. Teamspeak is used particularly frequently in Environments such as game communities (clans, guilds) are used. The requirements for Teamspeak are very low so that even older computers have no problems with running Teamspeak in the background. Teamspeak is ideal for use in reaction time-dependent (keyword: ping ) games, such as Counter-Strike. In contrast to Skype, Teamspeak is specially designed to serve large groups of clients.
- Teamspeak is chatting software that is primarily geared towards parallel use with online games. It enables agreements with fellow players in real-time without them being in the same place.
- You can write or make phone calls with friends on Teamspeak. The language quality of the tool is considered particularly good.
- You can call with just one person or with entire groups. Files can also be sent via Teamspeak. So you always stay up to date with your gamer friends.
- You can download the software as a 32-bit or 64-bit version.
System requirements TeamSpeak 3
| operating system | CPU | R.A.M. | HDD | miscellaneous |
|---|---|---|---|---|
| Windows 2000, XP, 2003, 2008, Vista, 7 or 8 | Intel Pentium III, AMD Athlon XP or more recent CPU (recommended: 800 MHz or faster) | 128 MB RAM (recommended: 512 MB or more) | 50 MB storage space | DirectX 8.1, internet connection, speakers and a microphone |
| Mac OS X 10.4 (Tiger) or newer | Mac computer with PowerPC G4 / G5 or Intel processor (recommended: 800 MHz or faster) | 128 MB RAM (recommended: 512 MB or more) | 75 MB storage space | Internet connection, speakers and a microphone |
| A current Linux operating system with libstdc ++ 6 (certain distributors may require the installation of other packages.) | Intel Pentium III, AMD Athlon XP, or more recent CPU (recommended: 800 MHz or faster) | 128 MB RAM (recommended: 512 MB or more) | 25 MB storage space | X11 desktop environment (e.g. GNOME or KDE, internet connection, speakers and a microphone |
| Windows 2000, XP, 2003, 2008, Vista, 7 or 8 | |
|---|---|
| CPU: | Intel Pentium III, AMD Athlon XP or more recent CPU (recommended: 800 MHz or faster) |
| R.A.M: | 128 MB RAM (recommended: 512 MB or more) |
| HDD: | 50 MB storage space |
| Miscellaneous: | DirectX 8.1, internet connection, speakers and a microphone |
| Mac OS X 10.4 (Tiger) or newer | |
| CPU: | Mac computer with PowerPC G4 / G5 or Intel processor (recommended: 800 MHz or faster) |
| R.A.M: | 128 MB RAM (recommended: 512 MB or more) |
| HDD: | 75 MB storage space |
| Miscellaneous: | Internet connection, speakers and a microphone |
| A current Linux operating system with libstdc ++ 6 (certain distributors may require the installation of other packages.) | |
| CPU: | Intel Pentium III, AMD Athlon XP, or more recent CPU (recommended: 800 MHz or faster) |
| R.A.M: | 128 MB RAM (recommended: 512 MB or more) |
| HDD: | 25 MB storage space |
| Miscellaneous: | X11 desktop environment (e.g. GNOME or KDE, internet connection, speakers and a microphone |
Supported platforms TeamSpeak 3
| operating system | service | architecture | |
|---|---|---|---|
| Microsoft Windows | Client, server | amd64, x86 | |
| Linux | Client, server | amd64, x86 | |
| Mac OS X | Client, server | ||
| Android | Client | ||
| iOS | Client, server | ||
| FreeBSD | server | amd64, x86 |
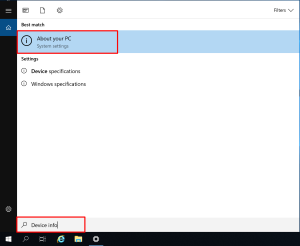
How to know which System type do you have?
- Press “Windows + S” Combination
- Now Type “Device Info” and press Enter.

- It will open About Console
- Now you can confirm which version do you have

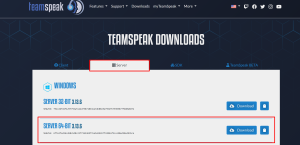
How to Download TeamSpeak 3 Server?
- Open your desired web browser
- Now Click on this official Download link – TeamSpeak
- It will redirect the official download page

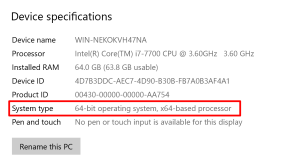
- before we start downloading, we need to confirm the Computer system Type
- For 32bit Architecture – SERVER 32-BIT 3.13.6
- For 64bit Architecture – SERVER 64-BIT 3.13.6
Cheap Dedicated Servers Buy here – Click here
How to Set up TeamSpeak 3 Server?
- After finished Download, Open Your Desired Download Folder.
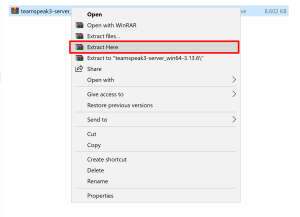
- Let’s extract the Downloaded Zip File called like this – “teamspeak3-server_win64-3.13.6”
- You can Extract it with windows Default Extractor.
- There are Many packing programs Available on the internet like – WinRAR etc.
- Right-click on the Zip file and click Extract Here.

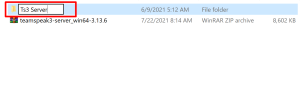
- After Extracting Process Rename The Zip file As “TS3” or “TeamSpeak Server 3”

- You can Move it anywhere you want.
- I will prefer you Move it to in desktop.
how to create a TeamSpeak 3 server?
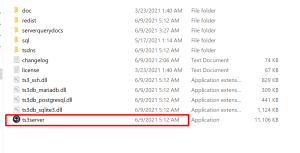
- Now open the TS3 Server folder.
- After that Run the Application Called “ts3server”

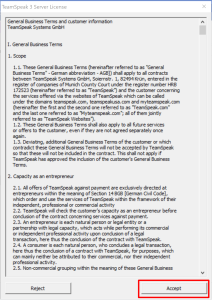
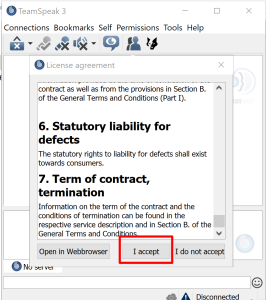
- The First time, You need to Accept the Agreements.

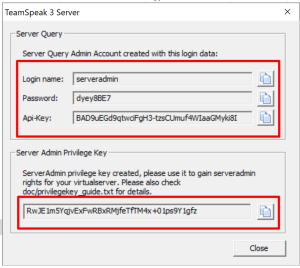
- After Accepting Agreements it Will open the Credentials Console.
- Now Most Important thing That you need to do is –
- Open Your Desired Notepad and copy All Credentials Information that you got.

- Now Paste It in Notepad and Save it to in your desired place.
Allow Ports For TeamSpeak 3 Server Through Firewall In Windows
In order for your Teamspeak 3 server to communicate properly, you need to enable certain ports in the firewall. In this practical tip, we will tell you exactly which ports these are.
These are the default ports that need to be forwarded and opened in your firewall:
These are the default ports that need to be forwarded and opened in your firewall:
| Service | Protocol |
Local Port (Server) |
Required? |
| Voice | UDP | 9987 | Yes |
| File transfer | TCP | 30033 | Yes |
| ServerQuery (raw) | TCP | 10011 | Optional |
| ServerQuery (SSH) | TCP | 10022 | Optional |
| WebQuery (HTTP) | TCP | 10080 | Optional |
| WebQuery (HTTPS) | TCP | 10443 | Optional |
| TSDNS | TCP | 41144 | Optional |
If you use the new Windows 10 firewall app allow thingy you can just say “allow”. It will be Automatically Enabled By the windows firewall.
Now TeamSpeak 3 Server Installation Process is Finished Now. Now we need to install TeamSpeak 3 client
How to Download TeamSpeak 3 Server?
- Open your desired web browser
- Now Click on this official Download link – TeamSpeak
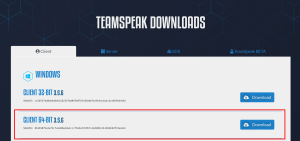
- It will redirect the official download page

- before we start downloading, we need to confirm the Computer system Type
- For 32bit Architecture – CLIENT 32-BIT 3.5.6
- For 64bit Architecture – CLIENT 64-BIT 3.5.6
Install TeamSpeak 3 client
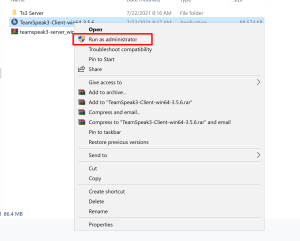
- After finished Download, Open Your Desired Download Folder.
- Now Open installation file as Administrator

- Click on Next
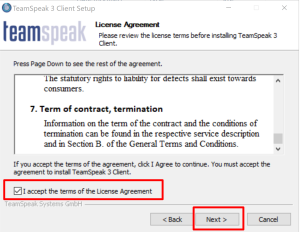
- Scroll down and Accept the Agreements and click on Next

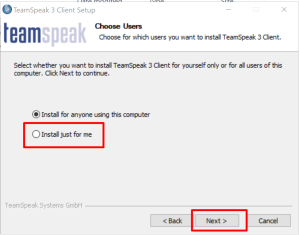
- Now choose for which users you want to install TeamSpeak 3 client

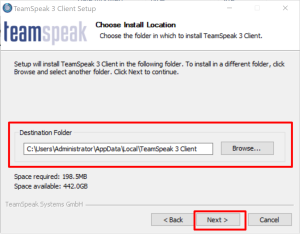
- Select your Desired Location and click on Next
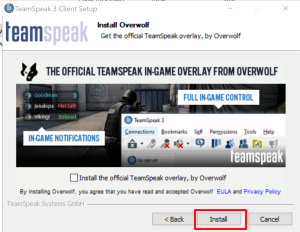
- Click Again Next and click on Install Button.
- You have installed TeamSpeak 3 client successfully.
Now Connect Via TeamSpeak 3 Client
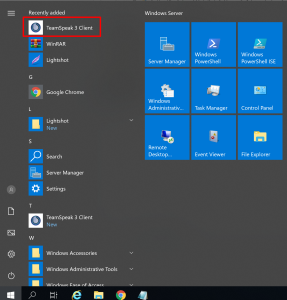
- Now open TeamSpeak 3 client from Windows start Menu

- Scroll down and Accept the Agreements and click on Next.

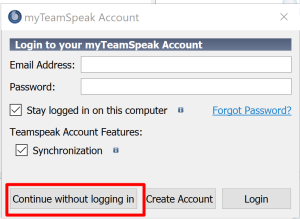
- Click “Continue without Logging In”

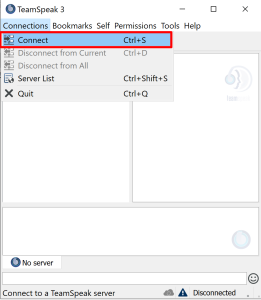
- From the Connections Tab Click Connect or Press “Ctrl +S”

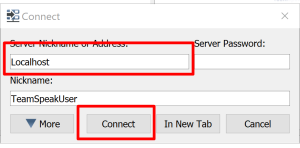
- Enter your VPS IP in Server Nickname or Address field
- How to know your VPS IP?
- Open your desired Web Browser and now type What’s my IP?.
- you Can See Your public Adress There
- Now Type your VPS IP in Server Nickname or Address field

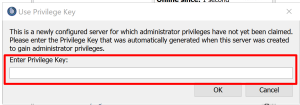
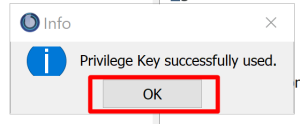
- Now Enter the “privilege key” that you Noted before.


- This will change your Rank as Admin.

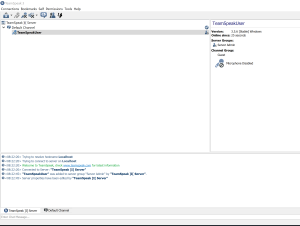
That’s All, You have Successfully Installed TeamSpeak 3 Server and TeamSpeak Client on Your Windows.